Making Custom Cockpit Cushions
Intro
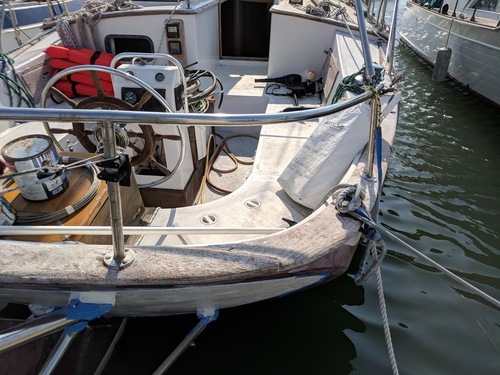
The Ericson 36C’s cockpit is enourmous. It’s also asymmetric. The companionway entrance is offset slightly to starboard and hatches in the seats aren’t quite mirrored. Standard off-the-shelf box cushions just aren’t going to work.
Design
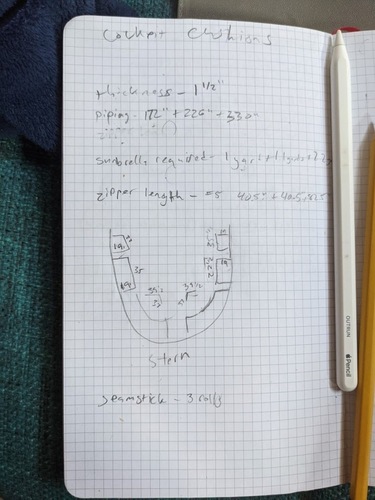
To make an accurate estimation of materials required, I decided to do a rough sketch:
Supplies
The sketch isn’t quite to scale, but it turns out it takes loads of material to sew these cushions. These six seats required the following supplies from my favorite online retailer, Sailrite:
| quantity | name | cost |
|---|---|---|
| 3 | Foam Closed Cell 1-1/2” x 56” x 48” | $467.40 |
| 4 yards | Sunbrella Marine Grade 6031-0000 Burgundy 60” Fabric | $95.80 |
| 10 yards | Dura-Skrim Patterning Material 74” | $29.50 |
| 4 yards | Cushion Underlining Black 54” Fabric | $31.80 |
| 65 feet | Naugahyde Universal Vinyl Welting / Piping Pure White | $42.25 |
| 4 | Seamstick 1/4” Basting Tape for Sailmaking & Vinyl (50Yds) | $16.80 |
| 10 | YKK AquaGuard Reverse Tab Slider #5 Black Non-Locking Pull | $4.50 |
| 15 feet | YKK Continuous Zipper Chain #5 Black (Coil Chain) | $5.25 |
| 10 | DOT Twist-Lock Fastener Cloth-to-Cloth SnapRite Button Back Set (Nickel Plated) | $12.80 |
| 30 | SnapRite Fastener Cloth-to-Surface Set 3/8” Stud (Nickel Plated) | $19.35 |
Total: ~$725
Imagine what it would cost to have someone else make them!
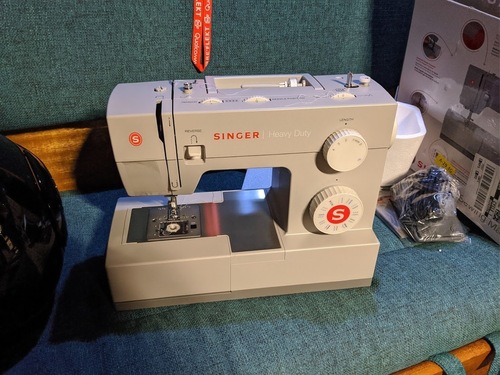
I used a Singer Heavy Duty 4423 with a walking foot to do the sewing.
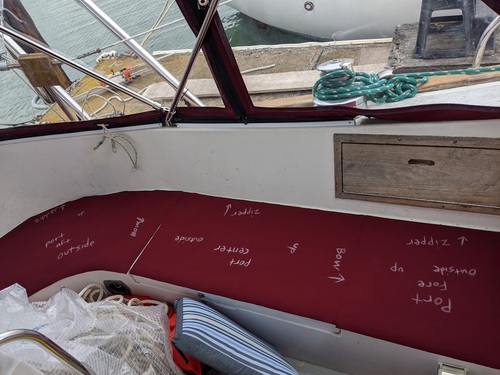
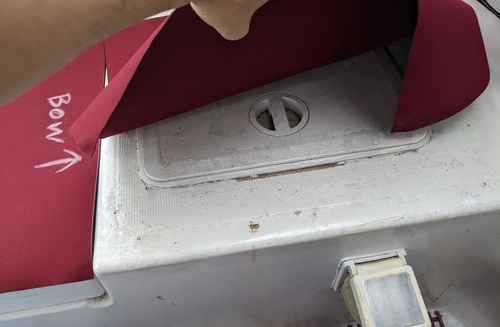
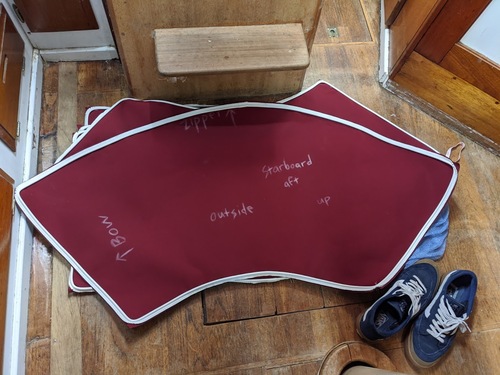
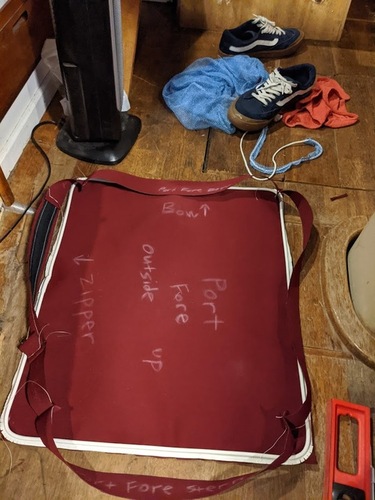
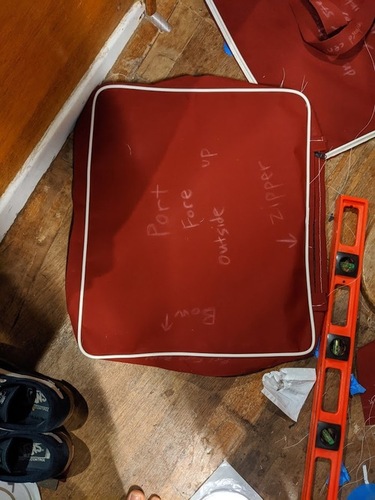
Measuring
I followed a Sailrite tuorial on making your own cockpit cushions. Wouldn’t it be nice to have a cockpit with such square sides?
The patterning material (Duraskrim) from the list above is perfect for templating out oddly-shaped box-like structures! Here’s what it looks like to outline and cut out the correct dimensions:
This part is the easiest, but it’s also the most critical. If you mess up here, everything else that follows will be wrong. I felt some pressure to get this right and I’m glad I took the time to do so.
Building
Now we’re getting to the good part.
Cutting the Sunbrella
There’s more than one way to skin Sunbrella, but the best way is by using a hotknife. It makes quick (albeit smelly) work of cutting through the fabric, making sure the edges won’t ever fray as they would from even the sharpest of fabric shears.
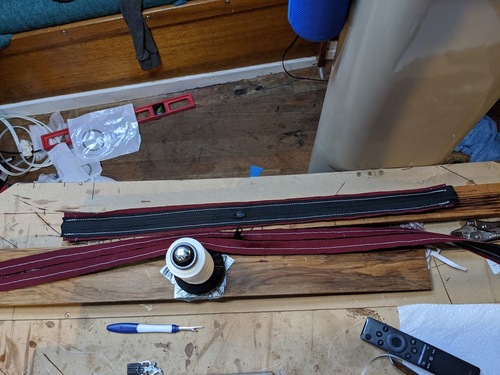
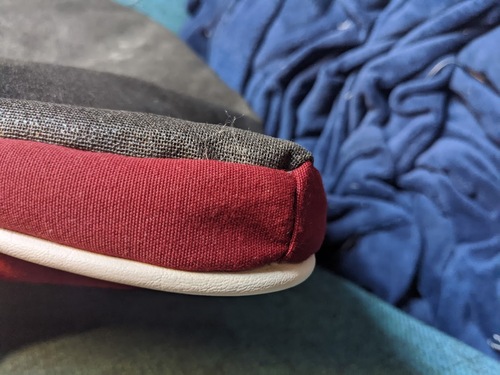
Sewing On the Piping
The Singer I used made quick and easy work of this part. The walking foot was essential to make sure the material would be fed correctly.
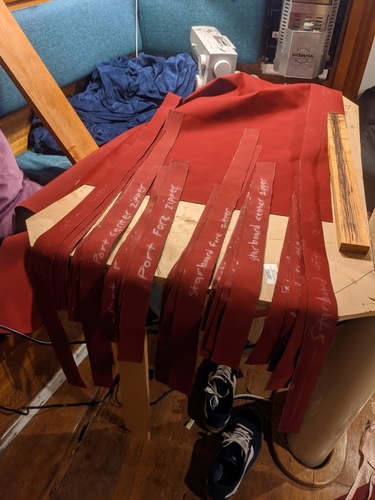
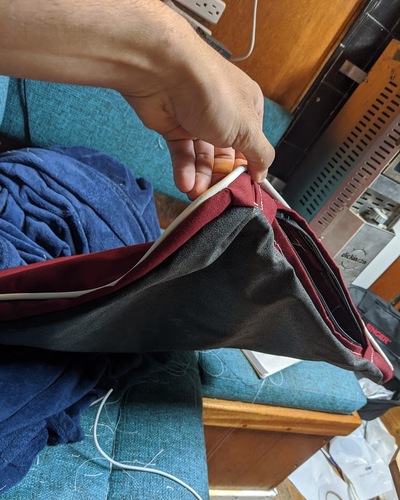
Sewing the Side Strips On
I made sure to put the zipper pulls on the side that would be against the hull, so they wouldn’t be visible. Sewing these on was quite a bit tougher than the first pass on the piping. I ended up breaking a ton of needles on this step. The toughest part was the thickest portion of the zipper pull where the material was six layers deep. I actually messed up and made them too short, having to add extensions on the later.
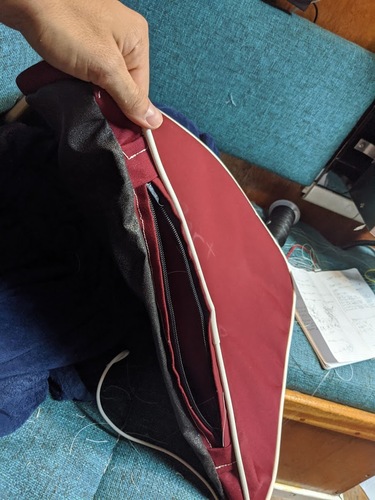
Sewing on the Underliner
This step didn’t break as many needles. It’s sewing through the same number of layers, minus the piping, and the underliner isn’t as tough of a material to puncture through.
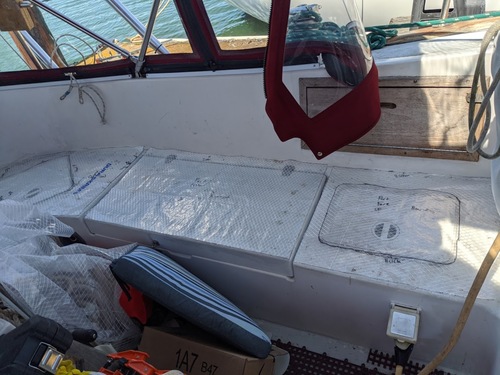
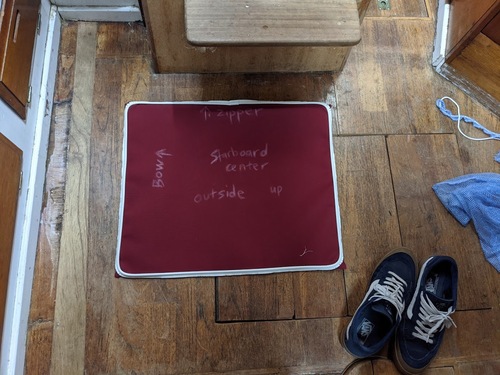
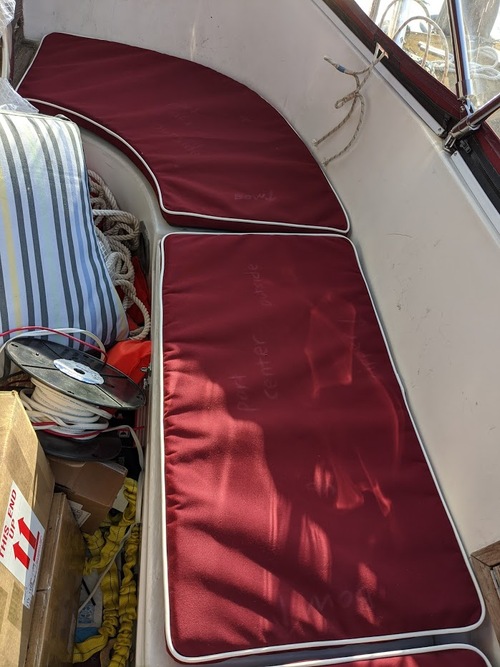
Finished Cushions
I’m very proud of how they turned out. It really adds to a bare cockpit with old, deteriorating gel coat (a project for another day). I didn’t get any pictures of cutting the foam, but that step was trivial. I used the exact template of the original Duraskrim pattern, slicing with an electric kitchen knife. That made the foam fit extremely (seriously) tight. It was a two-person job, forcing the closed-cell mat in, but it really makes the cushions pop!
Retrospective
This whole construction process took me a week, where I was on paid-time-off from work in isolation during the early days of COVID-19. It was big effort, but everyone that sees them compliments on how well they turned out, and I’d have to agree. The cushions pictured directly above weren’t properly rotated in the photos, but I promise they fit just fine.
They also double as flotation devices. Closed-cell foam is buouyant, firm, and you can never have too many emergency life rafts, and making them look good makes that much sweeter.
Please ignore the clutter in the photos. OutRun is only 36-feet long and I have many projects always happening concurrently.
Previous: Setting Up A Signal K Server with a USB Gateway | Next: Installing a New Electric Anchor System
- [ 2024-09-01 ] Don't do It
- [ 2022-08-30 ] Mast Work and Synthetic Rigging
- [ 2022-04-19 ] What Happened On the First Trip?
- [ 2022-02-22 ] What's the Plan for Departure?
- [ 2021-04-25 ] Replacing Chainplates
- [ 2021-02-19 ] Three Months of Hell in Napa
- [ 2021-02-02 ] Wireless Networking on a Sailboat