Three Months of Hell in Napa
Abstract
Antifouling time comes but once every other year, but what if that wasn’t the case? I decided long ago to use whatever option had me hauling out as intermittenly as possible. It turns out there’s a product that promises a ten-year bottom job — Coppercoat, which is headquartered in the United Kingdom, but I communicated with the US distributor, Coppercoat USA, which has their own application instructions that aren’t always in-line with the UK’s. It’s important to follow the directions very closely, reading and re-reading the Coppercoat “Dos and Don’ts” guide available at https://coppercoatusa.com/.
I figured, “While I’m out of the water for ten days, why not get the mast figured out?” What could go wrong, right?
A lot.
The List
It was probably a bit too ambitious to attempt to do this many things on my own:
Bottom
- Scrape paint
- Gel plane
- Fiberglass
- Fairing
Coppercoat
- Apply
- “Activate”
Through-hulls
- Fill old knotmeter through-hull
- Adapt transducer though-hull
- Install new transducer
Mast step
- Fiberglass step location
- Get replacement plate and step
- Fasten replacement step, plate, and base
Chainplates
- Pull back headliner, expose chainplates
- Cut old chainplates
- Get titanium chainplates made
- Attach new chainplates to knees
- Seal new chainplates
Table
- Get mahogany pieces cut
- Dry-fit pieces
Repaint
- Cockpit
- Deck
Yeah… in ten days… right.
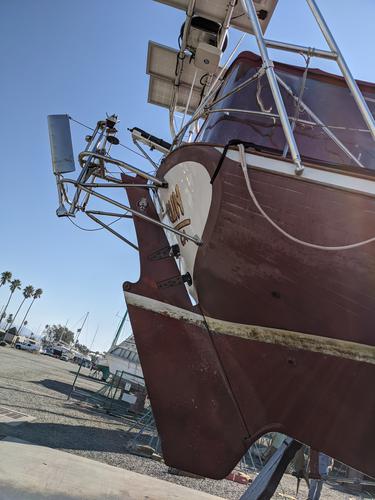
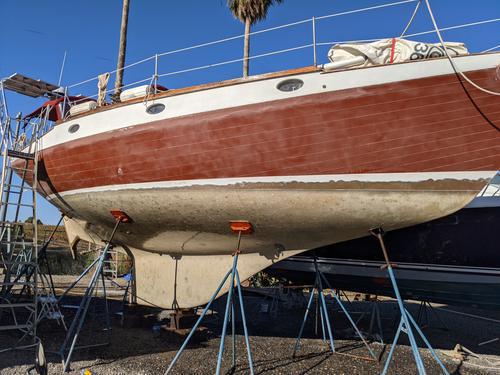
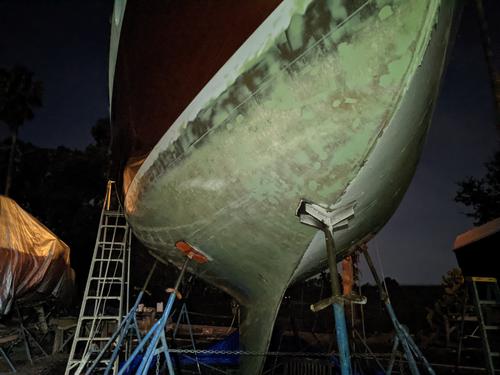
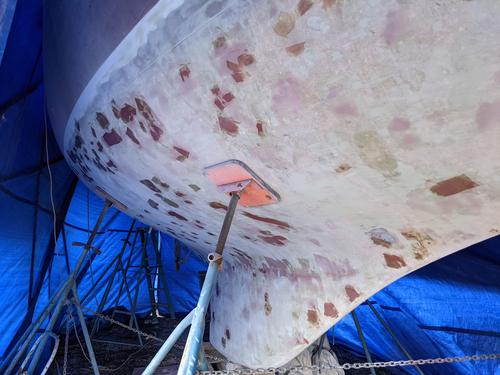
Blisters in the Sun
Well, f***.
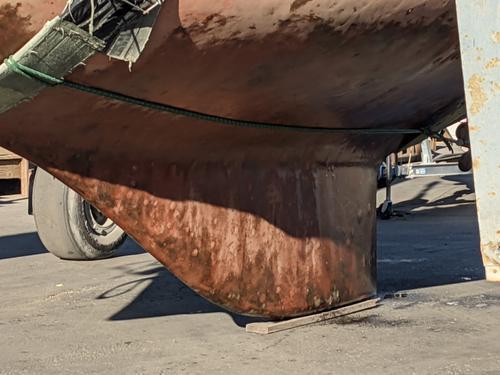
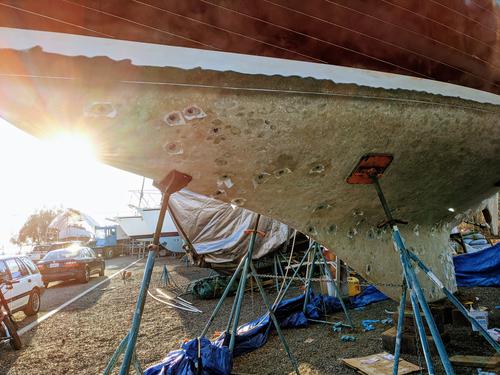
That’s not what I was hoping to see. Anything less than a perfectly-faired hull is an unwelcome sight, but this many osmotic breaches are going to be a real headache… and probably a backache.
Pick-up Sticks
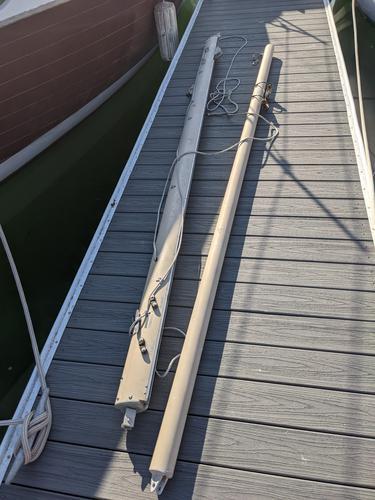
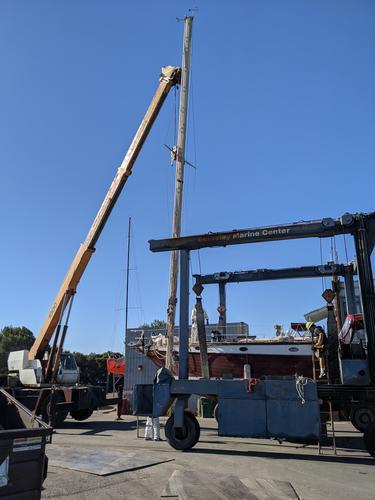
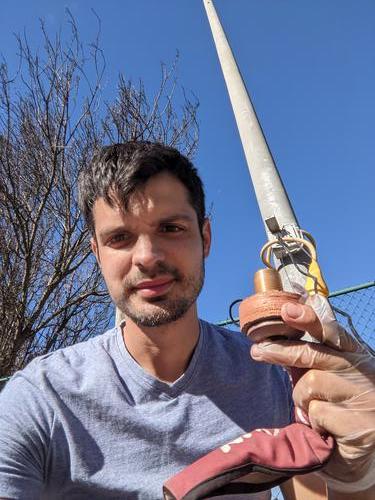
Removing my main boom and staysail booms are an easy first step. Anything that makes the rigger’s job faster and easier is worth it.
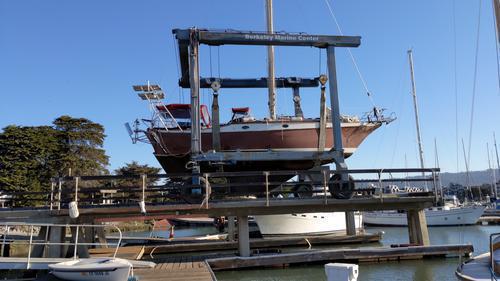
Berkeley Marine Center doesn’t have a crane that’s able to be positioned to pull a mast while a boat is still in the water, so they provide a haul-out at no charge and move the rig to a place that can be reached by their mobile crane.
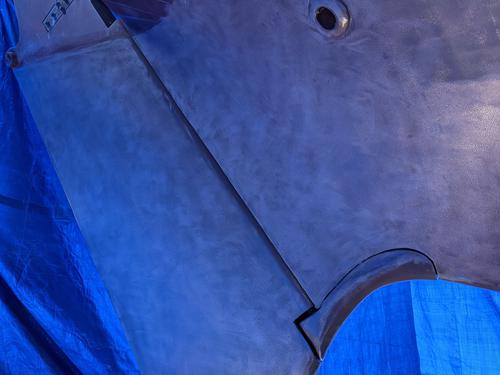
Watch Your Step
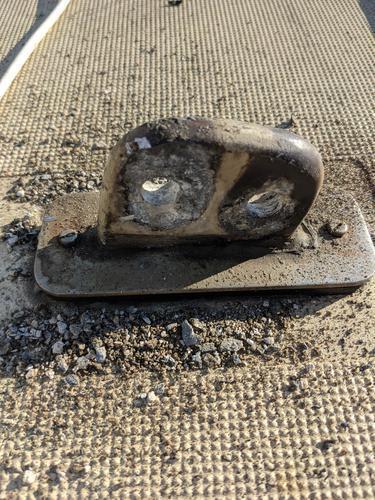
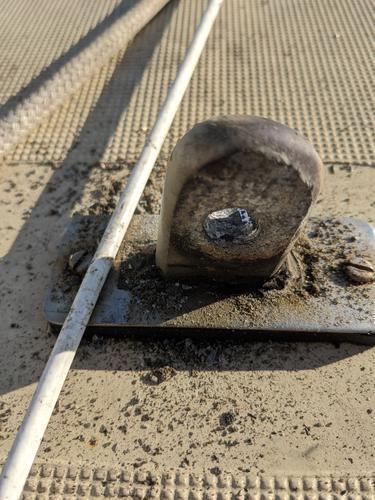
Yikes. This doesn’t look like it’s from the factory. The Ericson 36 C’s mast is stepped to the keel, which is encased in fiberglass. At some point, either this or some other mast step was tabbed in, poorly. ‘Looks like I’ll have to fix this at some point.
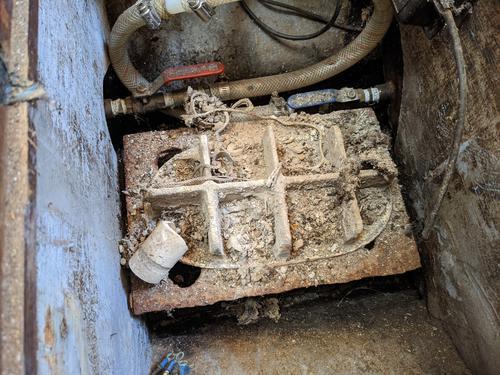
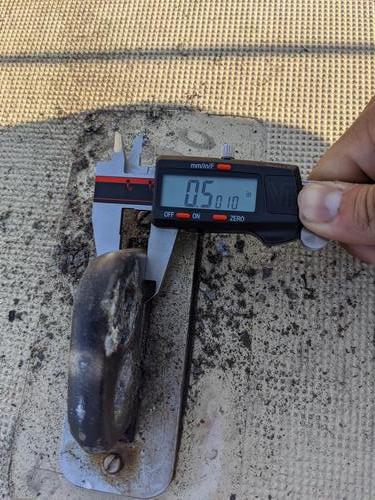
The mast step itself is made of aluminum and attached to a poor-grade steel I-Beam. There’s all sorts of dissimilar metal issues, considering how moisture could pool up in the step.
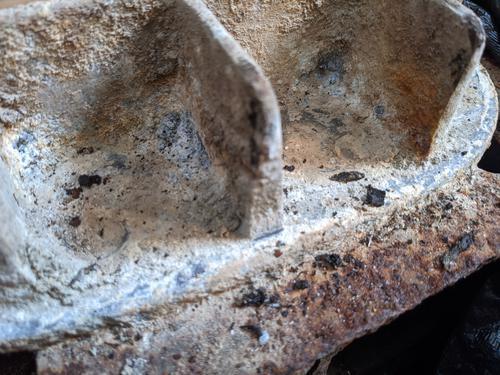
This thing isn’t even properly aligned. How could anyone have made this and thought, “yeah… that looks great.”
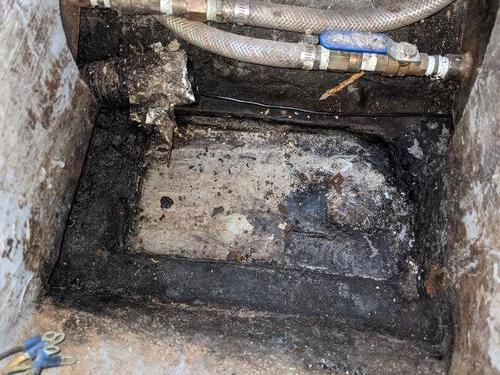
The old fiberglass tabbing and oil spots will need to be cleaned up before anything else can safely be placed in there.
Getting Away with the Bare Aluminimum
I need to explain my chainplates. To allow me to do that effectively, I need you to forget what you think you know about them.
My chainplates are enormous. They are tabbed all the way down my beam almost down to the cabin soles. The are like icebergs — only a small portion sticks out above deck. The rest, below looks like hanging knees, almost decorative in appearance. The catch here, and this confuses everyone, is that they are made of aluminum. To learn more about them, check out this other post I made that details how I got it fixed.
Yes, aluminum.

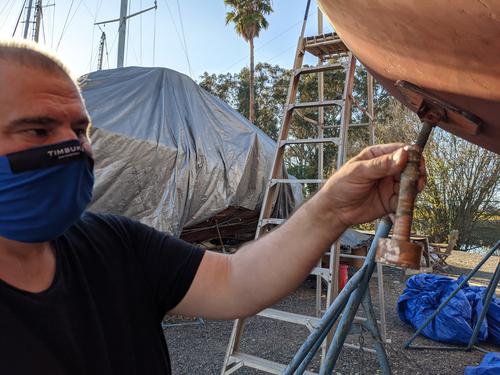
There was a steel pin affixing the turnbuckle rigging to the chainplates. This pin was there since at least the last time the standing rigging was changed out, which could have been any number of years (or decades) ago, which means…
More bad news. Galvanic corrosion strikes again. The steel had corroded directly into the less-noble (unweldable) aluminum. After hammering the pins out over the course of one hour, flakes of irrecoverable metal surround the chainplate cap.
I refuse to replace those giant pieces of aluminum. So, I’ll have to compose a plan with some people smarter than me.
Float On… Alright, Already
Now that the mast was down and Berkeley Marine Center was working on that stuff, I was able to head to Napa two days later to get the show on the road.
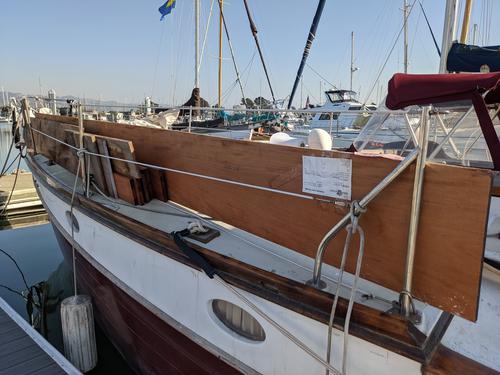
I set off to Napa with some precious cargo — a few dozen board feet of genuine mahogany, ready to be cut into drop leaf table assssembly pieces once day.
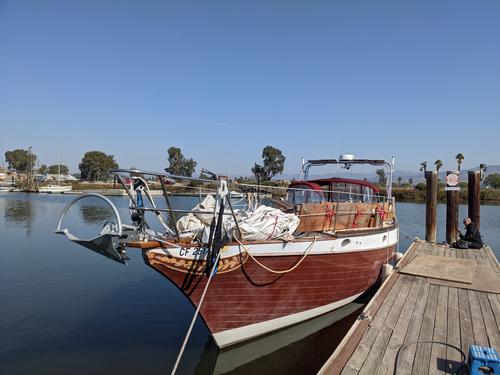
I arrived about an hour early after about five-and-a-half hours of motoring, riding the current on the way in on a clear, warm day.
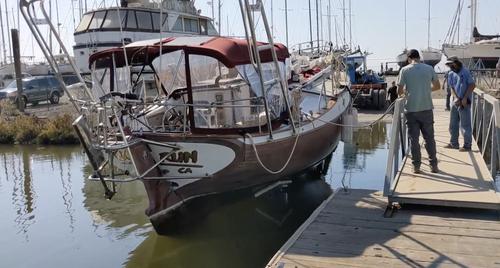
Napa Valley Marina uses a truck with a trailer with individually-articulating pads that can be positioned to safely lift a boat out of the water, up an inclined boatramp.

Copper Bottom Jeans
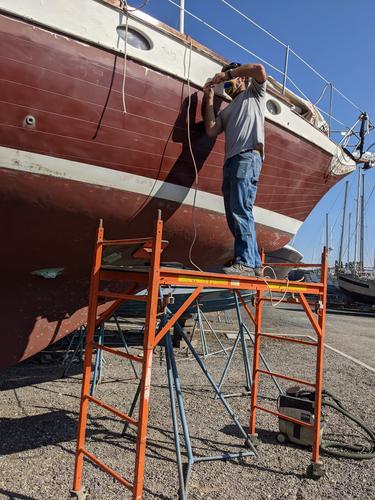
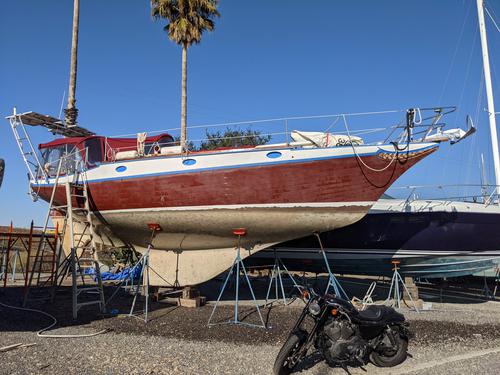
This is the big show; Napa Valley Marina — currently the only place that’ll let someone DIY their own Coppercoat job in the SF Bay, and perhaps the entirety of California.
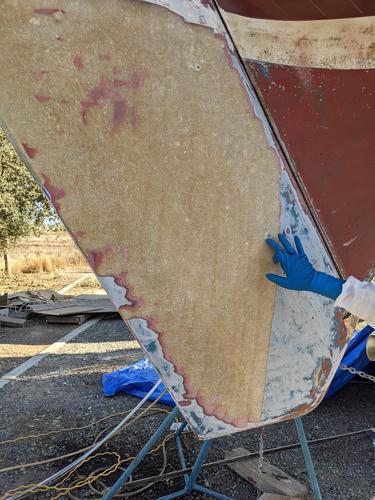
The plan was originally to scrape all the old paint off the bottom, but after seeing the osmosis damage, that doesn’t seem to be viable, anymore.
Take It Easy
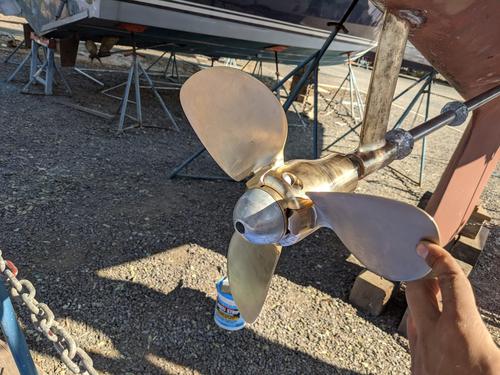
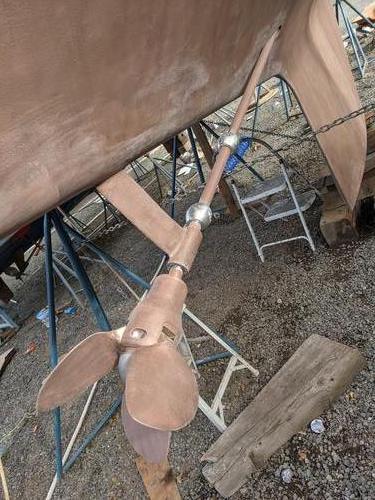
Flex-o-Fold makes, from what I can tell, the best folding prop money can buy, at least for cruisers. I spent a long time researching which prop may give me some advantage, both when sailing and when motoring. It turned out I could get a three-blade prop that is nearly tailor-made to my displacement, engine RPM, and transmision gear ratio.
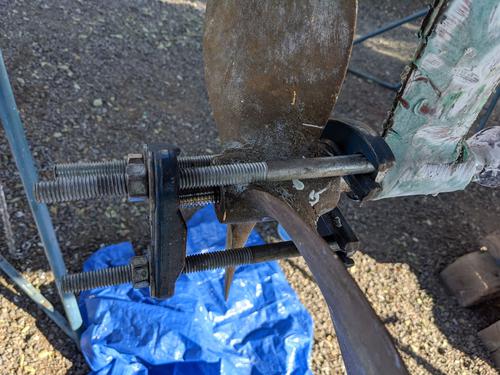
‘Might as well swap out the old prop for the newer, shinier model. It seemed like an obvious job to do while waiting for the yard to get their plan together for next steps for my blister situation. This was my first time removing a propeller and it was easy; just use a prop-puller and look at a reference image and it comes off without issue.
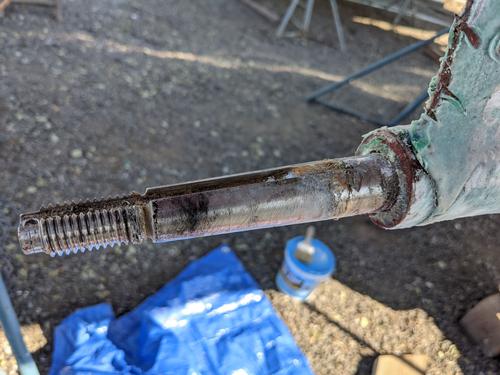
My prop shaft is a standard 1” tapered, keyed model. Before putting the new assembly on, I cleaneed the stainless steel up.
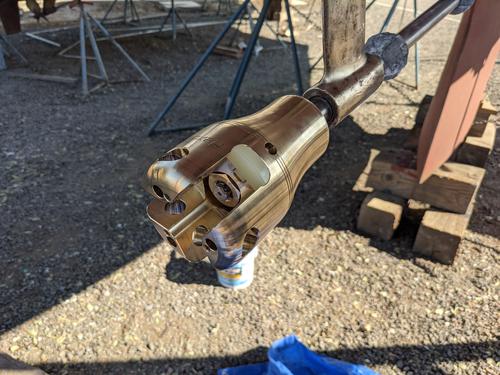
Flex-o-Fold provides excellent instructions for their installation, but even without them, anyone would be able to figure it out.
The opening and closing action is nice and smooth. I’m pretty confident that as long as the gearing doesn’t get too fouled up, just a little bit of centrifugal force will open it up.
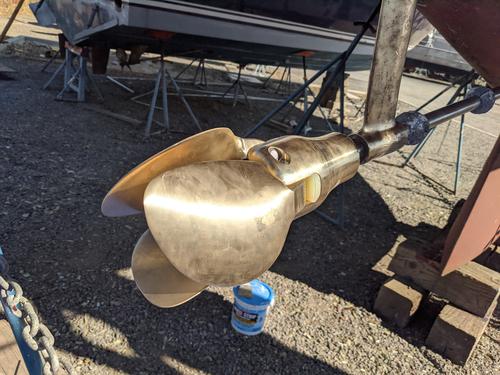
Look at this drag profile. Not too shabby.
I Get by with a Little Help from my Friends
Some volunteers from the Berkeley Yacht Club volunteered to come help me out with various things. Every bit helps, and I was grateful for every second they assisted.
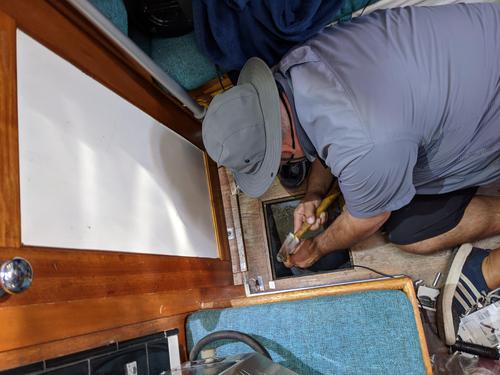
We remove the old knotmeter, which was mostly out of order. There’s no point in leaving a worthless piece of hardware in! It’ll be patched with fiberglass before leaving.
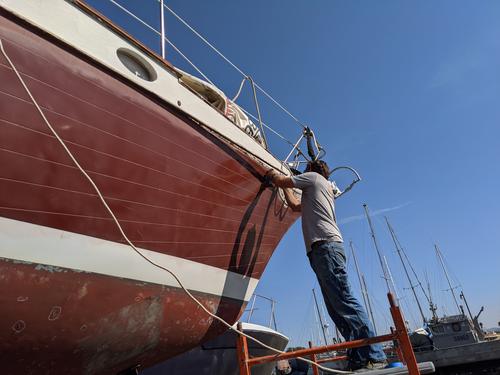
It seemed to make sense to remove the old rub rail. It was in rough shape, anyway, and was barely hanging on. I was planning to repaint the white topside stripe at some point while I was out here.
An oscillating tool with a carbide blade was the ticket to removing the old stainless steel fasteners. They were installed (the screwheads) from the inside.
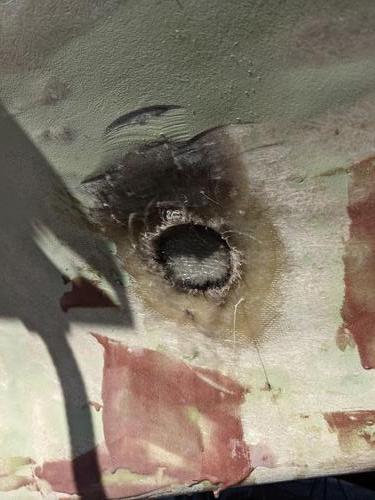
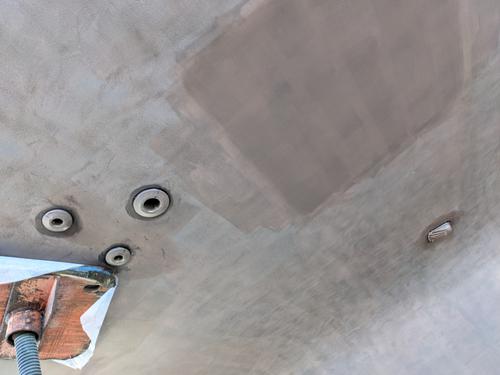
The old knotmeter through-hull was massive, giving me a new nearly two-inch hole in my bottom.
This was the first of many flathead screwdrivers I destroyed when removing through-hulls.

An extra set of hands makes removing large single pieces of trim easier. I later broke this piece on my own, by accident.
These protrusions that house depth sensors are called “fairing blocks,” but I like to call them “fluid friction magnets.” My new depth sounder (and also knotmeter combo) is able to be mounted flush to the hull and compensate up to 22°, which is just about the angle of the hull at the point of this hole.
Here is what the old depth sounder looks like when removed from its plastic housing. Weird.

And finally, at the end of the day, it’s time to start cleaning up the old gunk when the last time the rub rails were sealed.
Pop It
There’s more than one kind of blister, apparently.
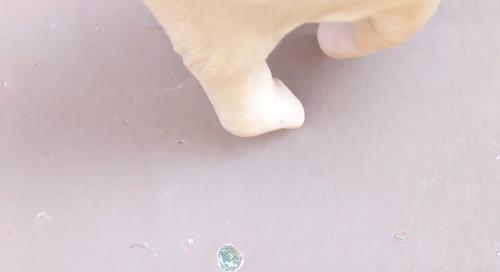
Most boat knowledge is inherited, received in a tribal manner. Some of it can be found on blog posts like this, but almost none of it can be considered objective or “absolutely” true. But I swear to you, I had blisters in both the gelcoat AND in the fiberglass.
The gelcoat zits seemed to be under some pressure and no matter which direction you face, they popped right into my mouth, which is particularly interesting considering I was masked.
Boats are Like Onions
The last bottom paint application was performed four years prior at KKMI in Richmond. There were some hude blisers thata were patched on the starboard side, but the vast majority were left alone as they weren’t large enough to worry about, according to my surveyor.
It seemed like a cool idea to try and use some varnish/paint stripper on the bottom. The previous layers were all one-part applications, so it made sense that they could at least be partially stripped off.
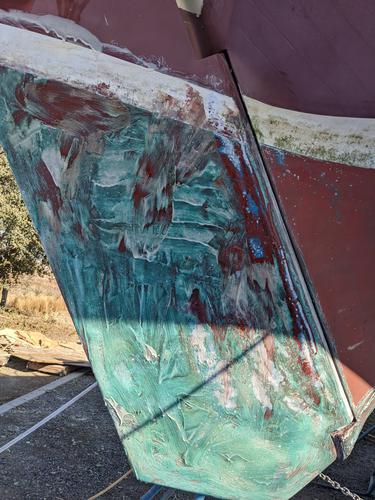
Once the stripper was applied, the embedded cupric oxide was visibily reacting to some chemical in the stripper, causing a near-instant patina effect on the top surface that permeated below over the course of an hour.
Taking a scraper to it, even after giving the varnish stripper time to work, it was clear this wasn’t going to work. Look at this mess. Just LOOK at it!
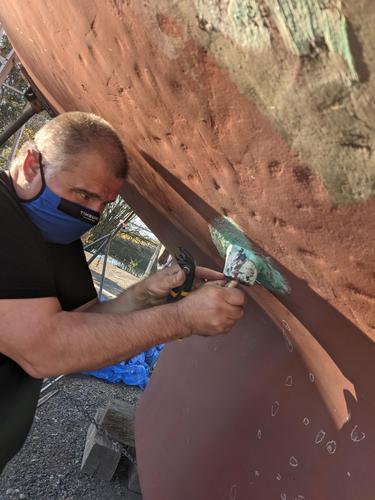
Gel Planer to the rescue. The yard has a tool that’s designed specifically to cut to a precise depth in a form factor similar to a large men’s electric facial razor. The tool is used to vertically stripe, from left to right.
The Ericson 36C has some awkward curves in the stern that the Gel Planer had issues conforming to. These would have to be revisted with a grinder (and a delicate touch), followed with an orbital sander.
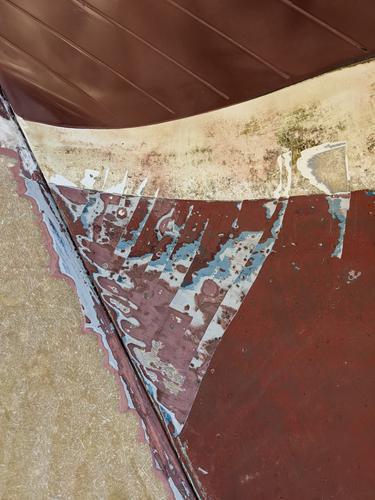
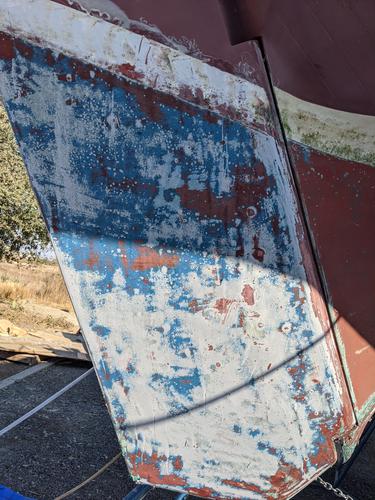
When you look at the cross-section of where the gelcoat was removed, you can clearly see some of the layers. In order, from top to bottom, we have:
- red bottom paint
- blue bottom paint
- red gelcoat
- white gelcoat
- gray barrier coat
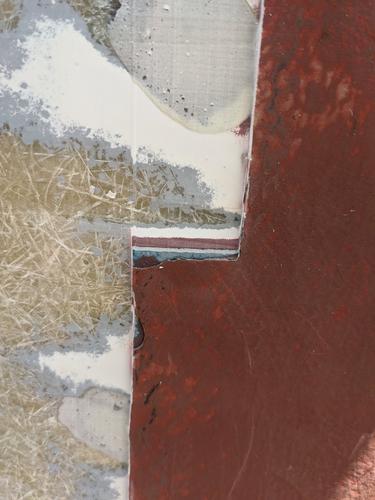
Now we’re getting to some more microscopic views. Existing patches of previous fairing and filling start appearing, as well. Note all of the voids in the compound. That can’t be good, can it?
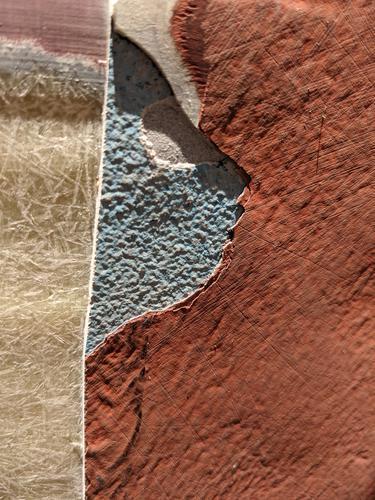
Based on the chipping that’s occurring, it seems obvious that there isn’t good adhesion between some of these layers, indicating at least one poor bottom job application.
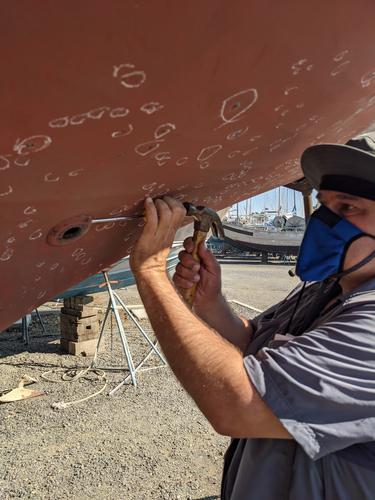
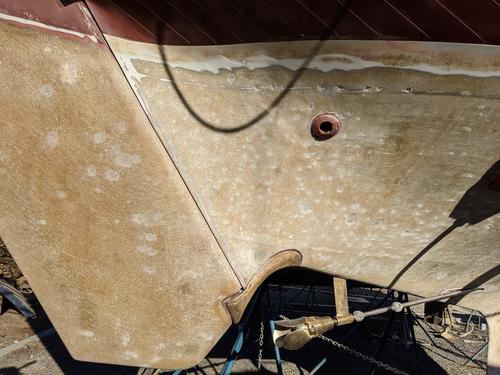
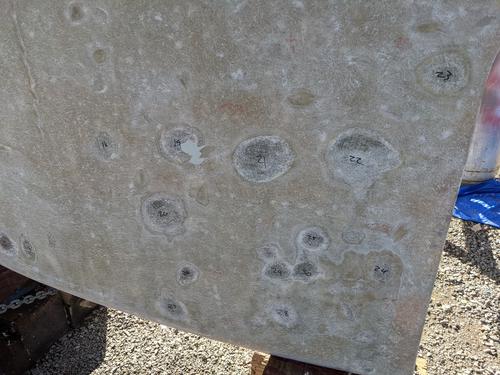
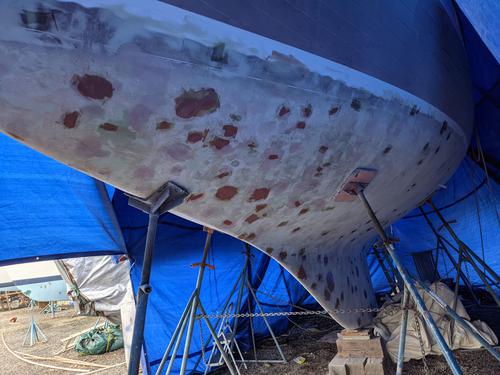
And now for the least understood type of blistering — pox. These small lesions were only on the starboard side, but numbered in the hundreds. It was likely nearly one thousand, although an exact count was not possible to get.
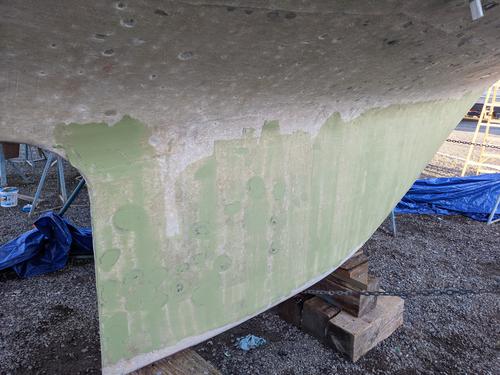
After a first pass of scraping, Gel Planing, grinding, and a rinse, things aren’t looking so bad, are they? The labor for the yard peeling off the gelcoat was an even $4000.
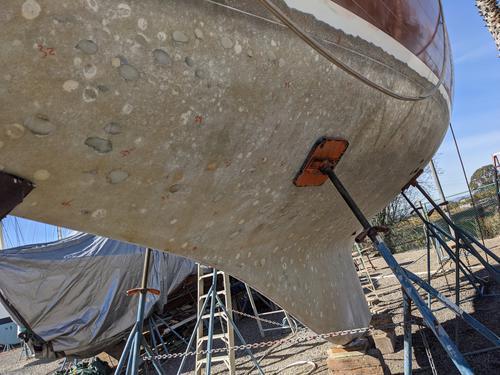
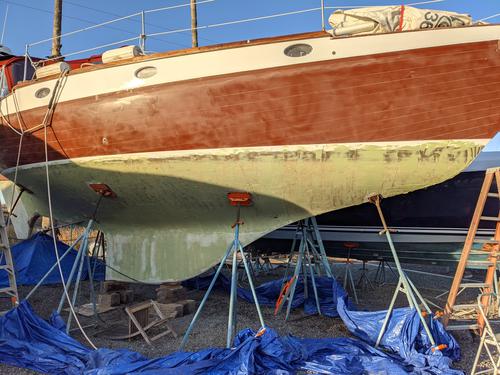
The port side had many blisters, but their average and maximum sizes were larger, particularly on the keel.
If It Bleeds…
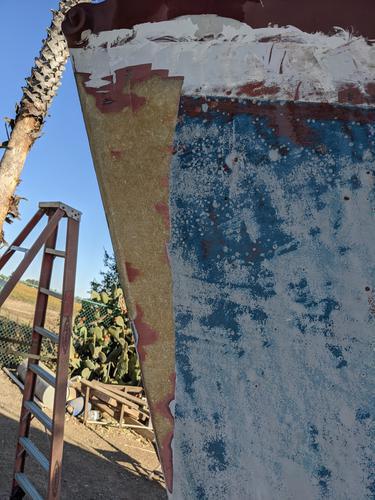
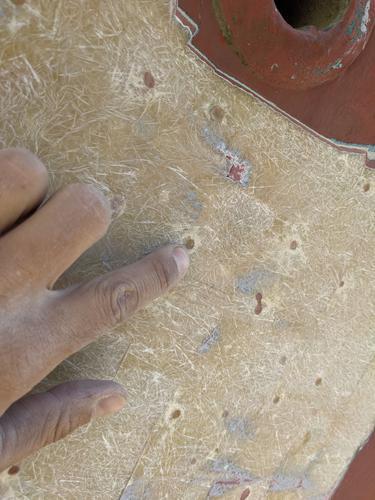
The fiberglass blistering was caused by uncured resin from the original layup in 1975. Over time, water intrudes through gelcoat, past barrier coat, and pushes up against the glass fibers that are supposed to be encased in a cured polymer. But, for whatever reason, the mixture didn’t appear to have completed, leaving behind a highly water-soluble red fluid that does nothing but fill space, with the potential to absorb even more water into it.
After the fiberglass was exposed and cleaned, on hotter, windier days, it would find its way out of its prison, seeing air for the first time since it was originally mixed.
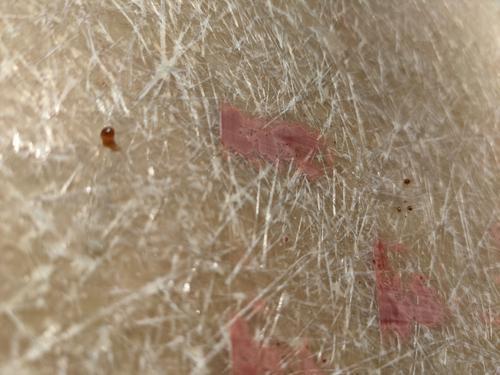
This fluid, when dry, returns to its state from before it was wet. In time, when exposed to air, it will harden up a bit, but will be easily washed away with even a little bit of water. That leaves the conclusion that the resin (whatever type it may be) was not properly mixed when catalyzed.
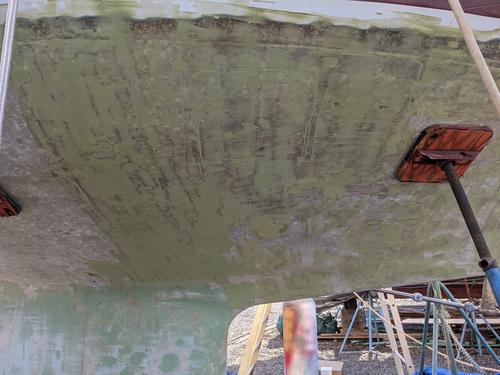
After powerwashing the hull, it would displace the resin in the lightly-colored voids (pictured above, easily visible on the port side photo). While the resin is waterlogged, its reduced viscosity allows it to leak out from the fiberglass, which can then be easily identified and cut out with a grinder.
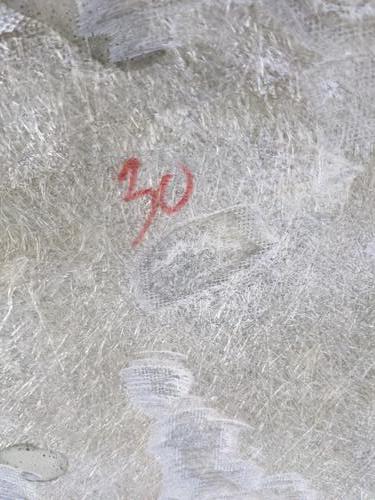
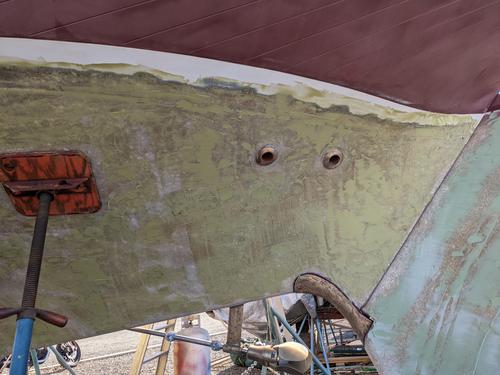
Amongst the grinding marks, this numeric graffiti that’s visible is my way of documenting moisture meter readings. I put the baseline initial readings in red Sharpie, so I’d be able to compare them to readings I took in the future. The meter maxes out at 35%, and the lower the figure, the better. The “average” rating I got on this pass was around 30%. Although the science behind these measurements is dubious (it’s actually garbage), it’s recommended by serious boat people that you should be at 15% or, the Holy Grail number of 12%. We’ll have to see how The Great Drying turns out.
Ice and Fire
Winter nights in Napa can get pretty chilly. On a dry evening, the temperatures usually get to just below freezing, where a thin layer of ice can form on the deck.
Winter days aren’t as warm or dry as summer. The relative humidity can hover at around 50%.
The combination of these two things aren’t great when you’re trying to “dry” out your hull. Airflow will do a great job of wicking away moisture from a substrate, as long as the moisture content of that air is lower than the saturated material. Getting it hot doesn’t hurt, either. Knowing this this, I had an idea:
A FLAMETHROWER.
Flames will evaporate moisture, create turbulent, random airflow, and speed up drying time by a couple of exponents. I used the following equation to calculate what I needed:

Hiking the Skirt
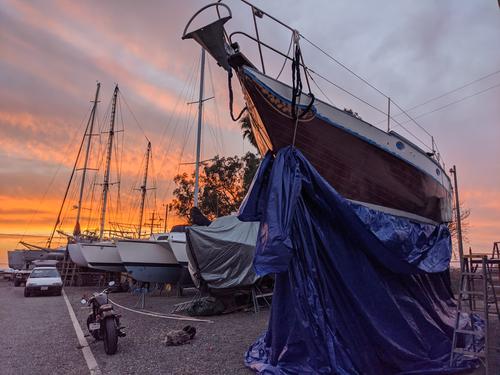
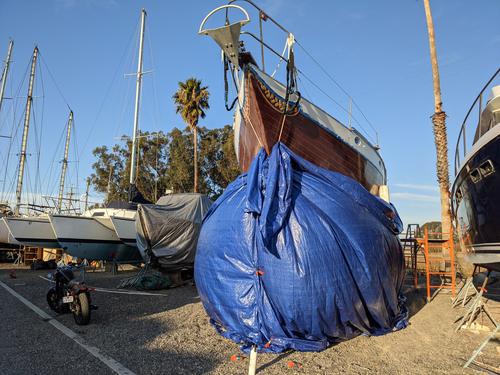
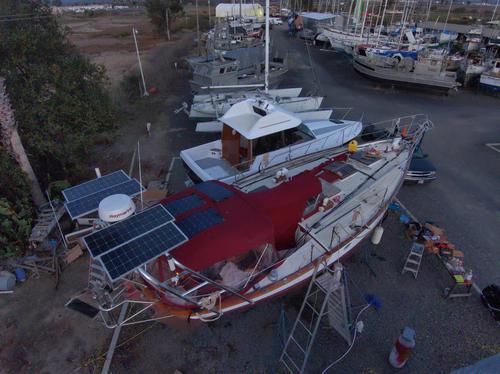
Using some tarps, I was able to fashion a “skirt” to hold in some heat for what was to come next. I happened to think it looked beautiful in a way, like the boat was smashing through a large wave even the she’s on land.
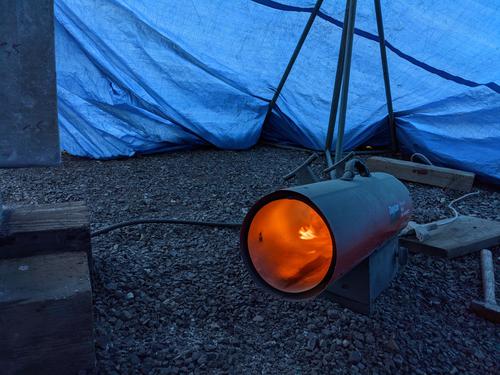
This flame, which used 15 gallons of propane per day, burned with the power of a thousand suns, heating up even the boat’s interior to 80° F throughout a freezing night. After four days of near-constant usage, I had worked my way through 60 gallons of gas.
Also under the tarp were two fans and a large dehumidifier that was sized for a house, just to give another little edge on reducing the moisture content in the skirt.
Take note that I did leave a fire extinguisher out front, just in case.
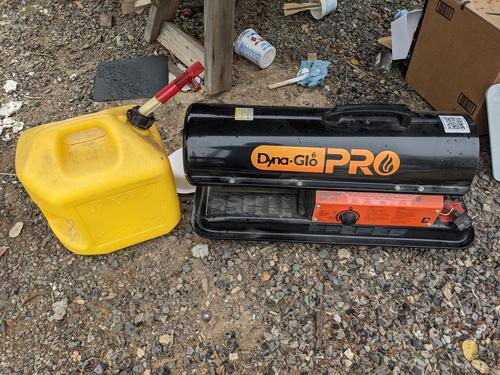
Propane was getting expensive and a fellow neighbor gave me this diesel flamethrower for free. It seemed much safer. Diesel is flammable at ambient air pressure, as opposed to combustible like propane gas. This model also had an automatic shutoff that was able to be set to a specific temperature, with an electric auto-ignite. I used this for an additional four days to bring the moisture numbers down further… and it worked. My “average” moisture readings are now at a nearly constant 15%!!!!!
High and Dry
Times are tough and people can’t always be relied on, least of all yourself.
All’s Fair[ed] in Love and… Nevermind
I went through a breakup during this period, where a long-term partner split up with me in front of the boat in the middle of the hardest part of the work at the peak of our relationship. This was the beginning of a period of declining optimism.
Sometimes it just takes one small thing to make you feel powerless. After that, the downward spiral starts.
When Chaos Reigns, it Pours
After one lost job, a death in the family, and an apparent standstill of progress later (all in the same two-day-period), I’d had enough.
After a couple days of constant back-breaking work, feeling sullen the whole time, it was time to make some drastic changes and decide how the heck I’d escape Napa, and when it could be done.
I started asking people for help and I started making a plan.
I was getting out of Napa on 23 January, an arbitrary date that felt achievable, come hell or high tide.
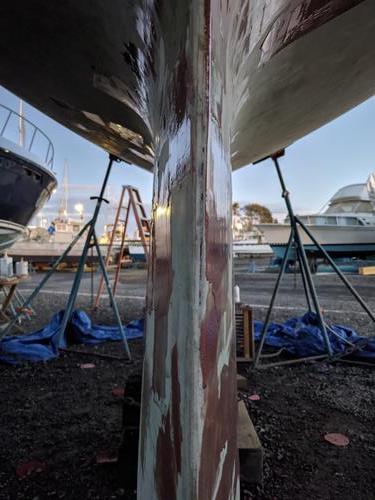
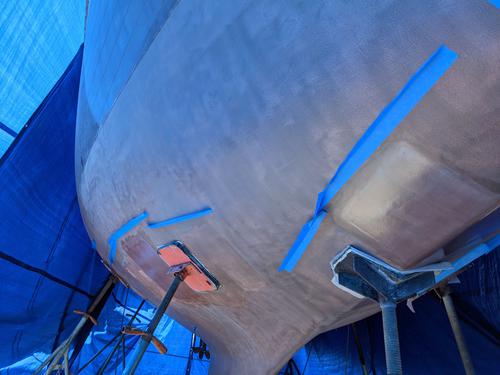
Fair Enough
Maybe I can’t make it perfect, but this is an opportunity to smooth out the hull I hopefully wouldn’t have for another ten years.
Sigh, I guess I’ll take advantage of it.
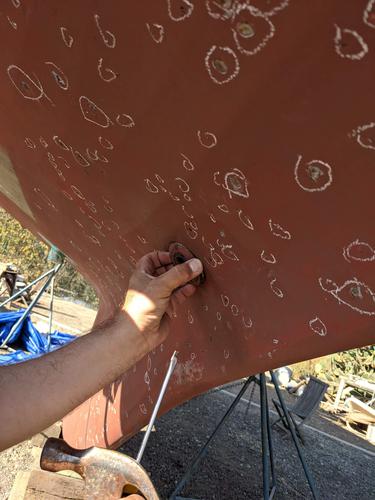
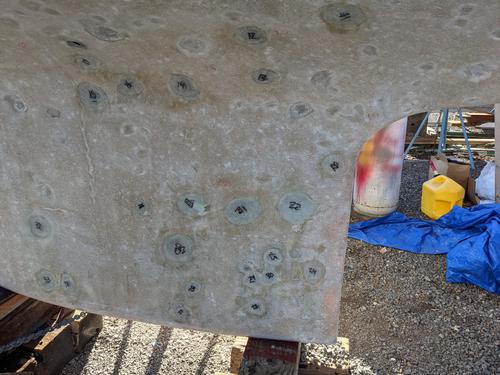
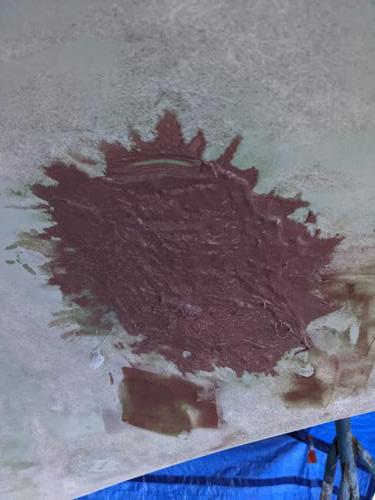
After carefully inspecting the hull where I’d ground out many hundreds of damaged areas, I was able to identify 128 blisters that were large enough to possibly be structurally-relevant. So, I traced them all out in conctentric circles to the exact shapes of the holes.
These cutouts are pretty big. When you look closely, it becomes obvious that the bulk of the osmosis damage was in the mat layer on top and the structural fiberglass beneath is in great shape.
After cutting the numbered spots out from 1708 cloth, you can see how they fit the original anomalies. Just look at this mess on the starboard keel.
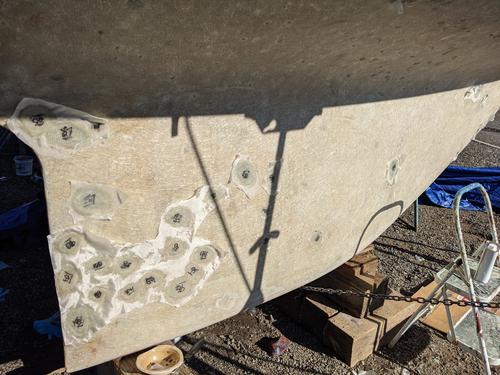
That cluster of damage was caused by osmosis.
The damage appears to be more severe the lower below the water you go. Perhaps greater water pressure speeds up intrusion past moisture barriers?
A Mostly Even Keel
The fiberglass patches helped, but there were still a great many divots in the glass that had to be filled in. Coppercoat shouldn’t be applied over an active minefield.
I chose TotalBoat TotalFair given a few things I’d read about its capabilities. It seemed forgiving and easy to use and it mostly was, but spreading it out took a lot of physical effort, particularly on the curved spots of the beam. It’s tiring stuff and spreading it out alone is really intimidating over an area as large as my boat.
Mixing it up is done “by eye.” The instructions basically say as long as it’s some shade of uniform green, you’re good to go.

I started out just mixing it on paper, which got torn up, then tried cardboard, which also didn’t work great, then I found that a block of pine that I got for free at Home Depot worked great.
This is clearly going to take more than one pass…
Few things feel as good, intrinsically, as finishing a pass of applying fairing compund.
Spraying off the dust after a sanding round and looking at the shine is pretty nice, too. But this is just the first application. It doesn’t actually look as good as this photo suggests.
I went with West System 105 resin, the 205 fast hardener, and 407 low-density filler to see how this would go compared to TotalFair.
While in the middle of this step, it felt like a good time to patch over the old knotmeter hole with some fiberglass patches.
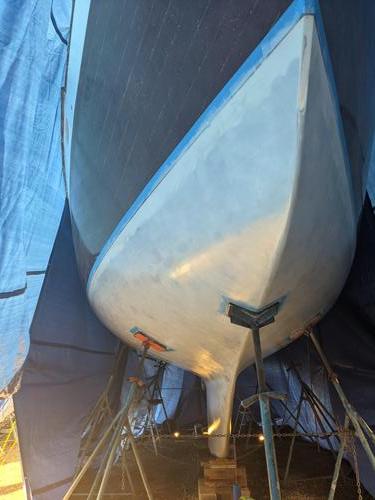
This is starting to actually look really good. We’re starting to pass the “finger test,” where you run your hand over the hull’s lines and can’t tell where the old damage was because it’s so smooth. Sure, the color isn’t uniform, but that’s fine for now.
There were, however, still some spots that required a third pass…
So, I kept at it. As I said at the beginning of the section, I wouldn’t have another opportunity for years. Another day of cure time is still within the tolerance of my 23 January departure date.
I know it looks gross here, but after this was sanded, you could never tell a two-inch hole for the old knotmeter was ever here.
Look at this and tell me it isn’t beautiful. You can’t.
It’s Like Watching Copper Dry…
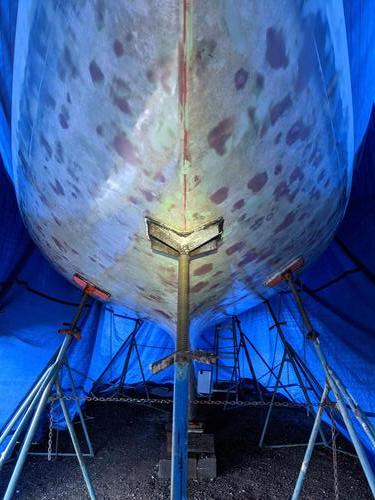
Tarpe Diem
You may have noticed above how in the middle of fairing I put up a tent structure. The weather in Napa was really starting to turn for the worst. I took advantage of the good weather while it was there.
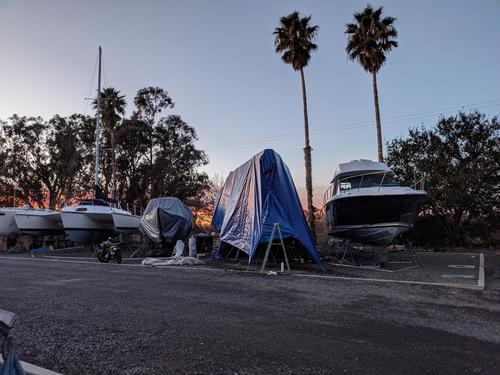
It just happened to look like an alien spacecraft when it was done. That suits me just fine. These tarps were reused by the yard when I was done with them.
I had to accomodate my arch and solar on the stern, so I just patched it all closed however I could.
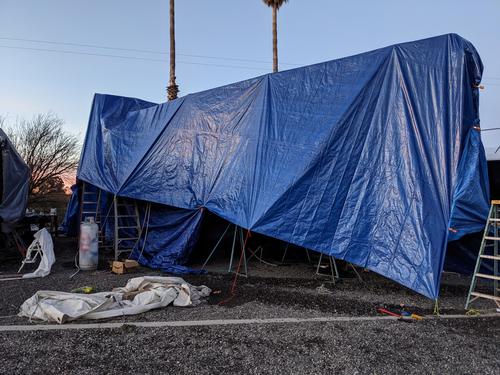
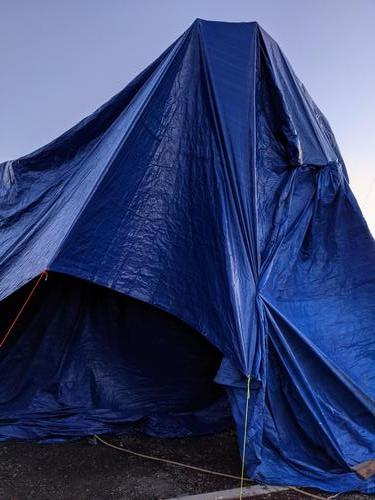
It’s really a big labyrinth of interconnected sheets that created a watertight seal from the top down.
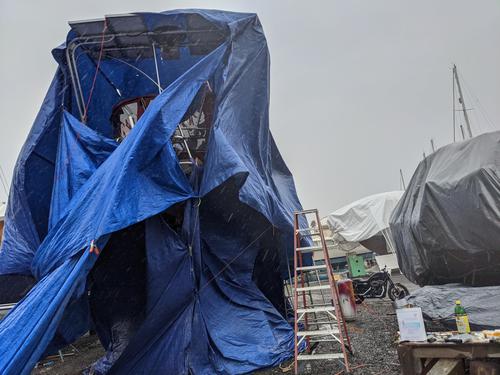
Even during the notorious California winter rainstorms that hit while it was up, the tent didn’t allow water intrusion.
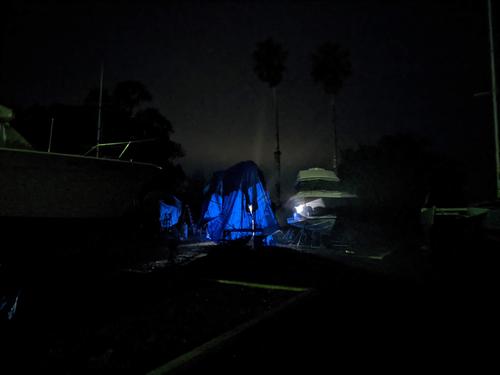
I left some low-wattage LED lights on underneath the tarp and it gave off some cool god rays from the seams of the tarps.
Erect Tile Conjunction
There was some information I’d found that suggested that a ceramic barrier coat would have 1% the permeability of an epoxy-based one, such as Interlux 2000E. Coppercoat USA recommended I go with Ceram-Kote 426, which is sometimes used as a barrier coat for pipes.
Ceram-Kote 426 is a two-part product with a 2:1 mixing ratio.
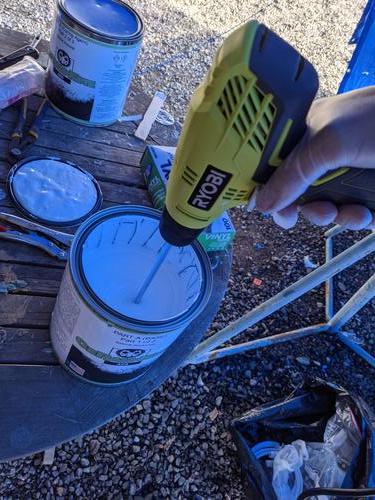
I bought a corded powerdrill to mix it for the recommended number of minutes using a paint mixer attachment.
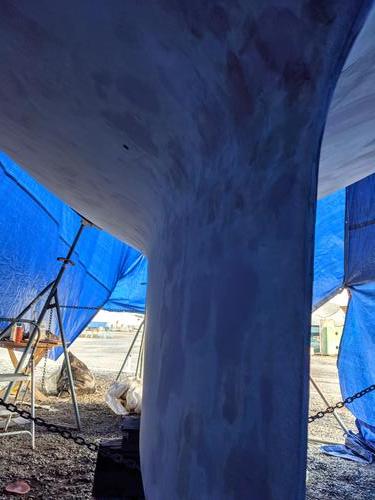
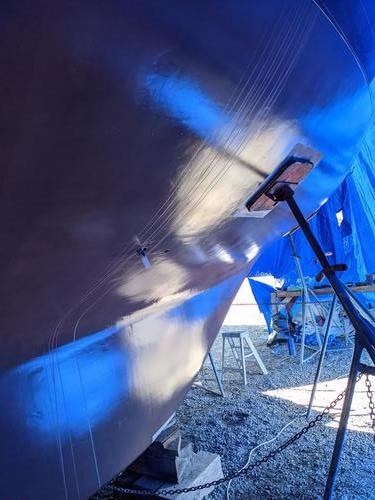
After two thin coats applied one day apart from each other (wet-on-tacky), the bottom is really starting to look fantastic, at least compared to before.
It Gets Knocked Down, then Gets Back Up, Again
At this point, I’m so excited. Coppercoat application day has arrived!
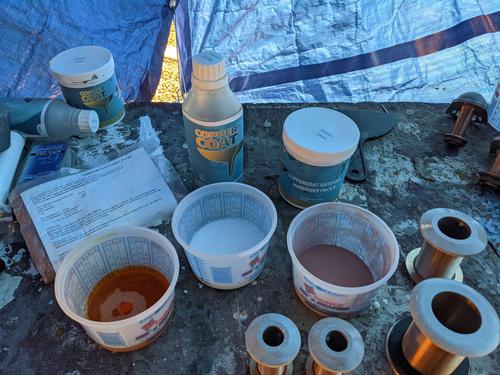
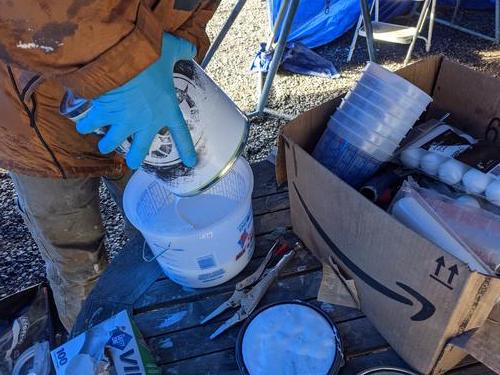
There are three parts to the mix. There’s the Part A epoxy base, the Part B epoxy hardener, and the Part C copper powder.
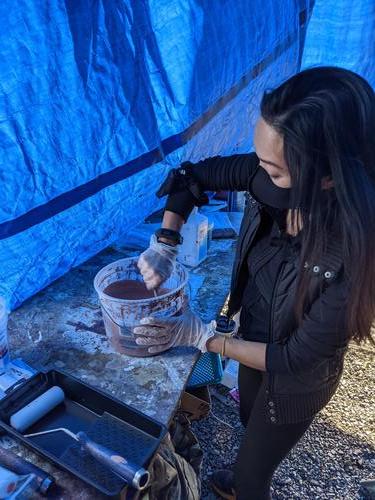
Just read the “Dos and Don’ts” guide from Coppercoat USA and find someone that’s willing to mix full time while your other volunteers apply the stuff.
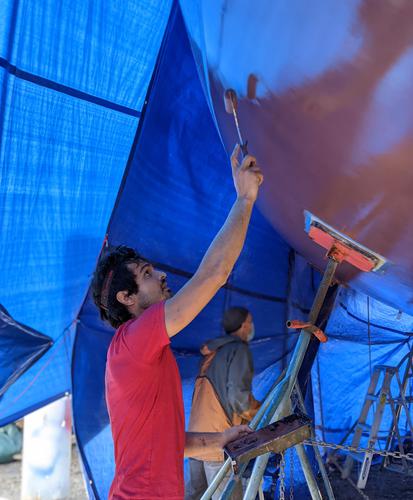
If it’s your bottom job, don’t be afraid to check on your volunteers to make sure everyone has the right expectations of how thick the product should be applied. After the second coat, the majority of the bottom was really starting to look great. Here’s a progression of how mine looked after each coat:
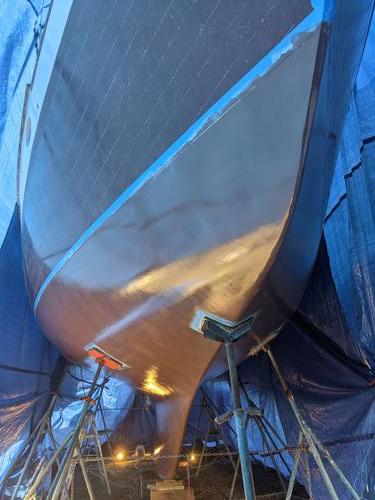
It took around seven hours for five people applying one coat after another to finish the full four coats, but we did a really thorough job.
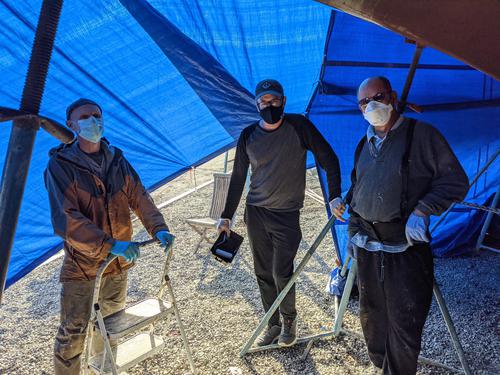
I’m so grateful to the DIY community at the Napa Valley Marina. The people really made all the difference. I’ve made some (hopefully) lifelong friendships. And the skills I learned while there will stick with me indefinitely.
Time Cures All Epoxies
Some just take longer than others.

Lots of people talk about how satisfying it is to peel tape. I don’t really get that sensation, but the fact that this job was almost in the books was its own brand of satisfaction.
Despite my best efforts with my tent, I had a small amount of water intrude onto the starboard side. I believe this was actually condensation that had accumulated high up and dripped down as I was coming on or off the boat at some point as opposed to rainwater getting in, which is still possible.
This damage to the Coppercoat wasn’t a big deal and didn’t delay me at all. I still had to apply under the jackstands and I could fix this up and reapply when that time comes.
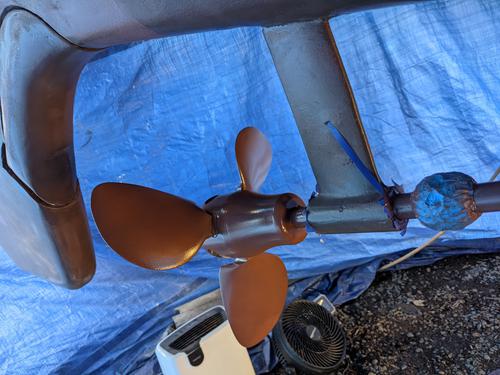
I also applied the CK426 and a few layers of Coppercoat to the propeller, carefully making sure none of the movement of the gearing was impeded. Since I had the extra kits of Coppercoat, why not?
Hey, Sandy
Coppercoat is useless if it isn’t sanded. At a molecular level, the surface tension of the curing epoxy completely encases the copper powder spheres, eliminating their capabilities of performing a high-surface-area biocide. Just sand according to the Coppercoat USA sanding guide to make sure copper gets exposed.
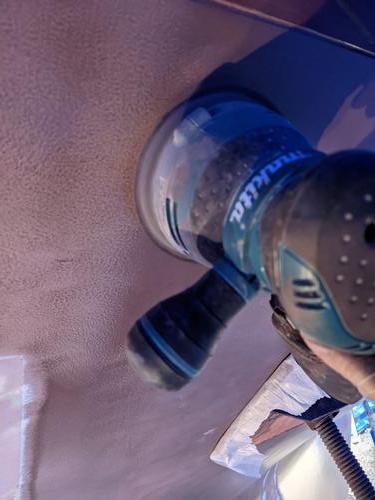
When I started, I was using a random orbital sander with 320-grit sanding nets and holding the sander flat. I noticed that this started to really burn through the Coppercoat, which isn’t what I wanted. After holding the sander at an angle such that I was only hitting it with the edge of the sanding net, I noticed a big improvement in the sanding job quality.
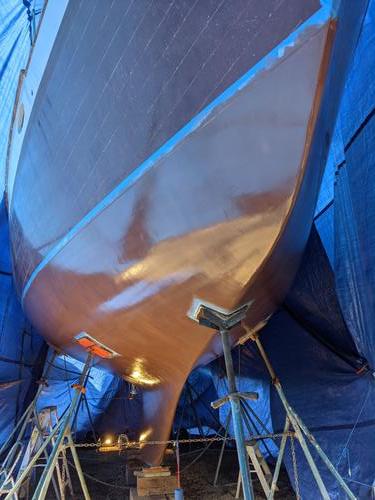
This looks a bit uneven compared to the unsanded views, but “the fish don’t care.” As long as the bottom of my cruising boat prevents hard marine growth, this will do just fine. It’ll turn a more uniform green over time, anyway.
To prevent the water drip issues that were pictured above while the Coppercoat cures, I put up some extra tape drip edges for any moisture that found its way onto the hull.
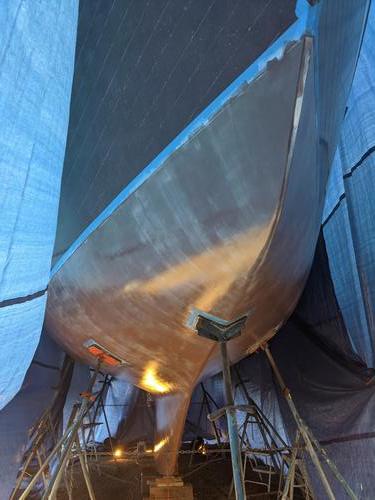
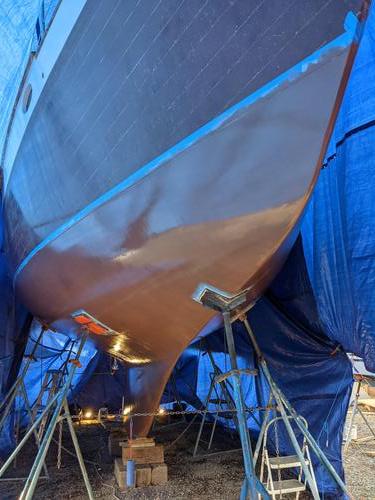
The prop and the rest of the bottom are all sanded and looking great. I’m very happy with how this all turned out!
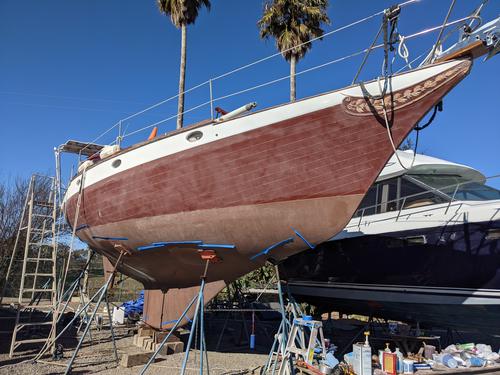
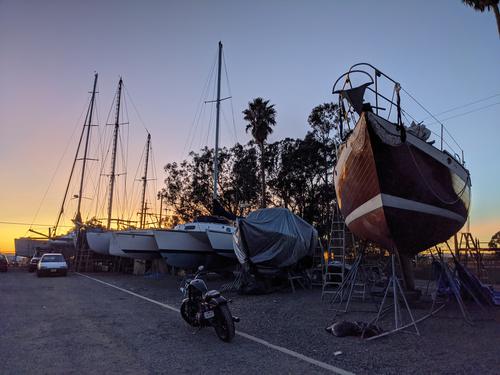
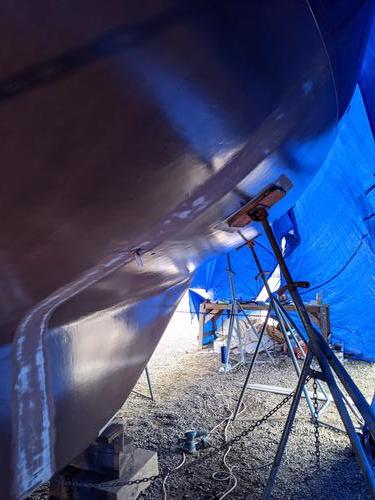
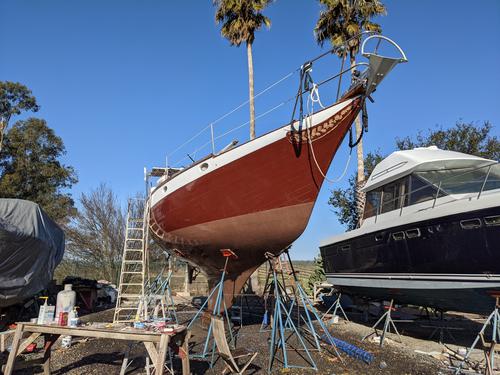
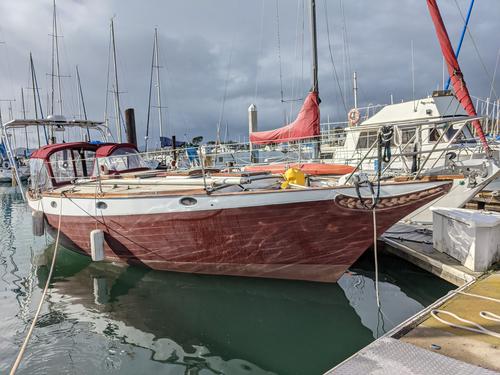
With the tarp removed, my boat finally gets to see the sun, again.
Doing a Through Job
Thorough*
We’re on the home stretch! Finally, all that’s left are a few relatively small jobs and cleanup.
This was my first time installing through-hulls. Given all the other changes I’ve made while out in Napa, adding the possibility of new leaks wasn’t something I was ecstatic about.
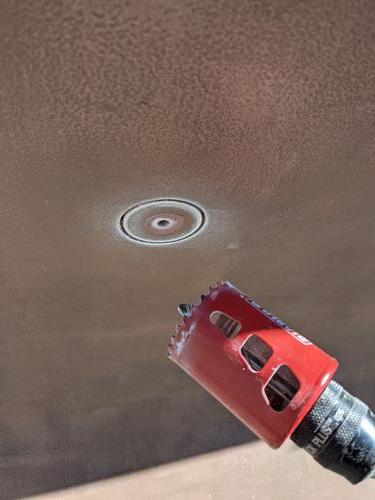
And here I am drilling a 2” hole in the bottom of a completed Coppercoat bottom job for a new transducer. This is not something you want to mess up.
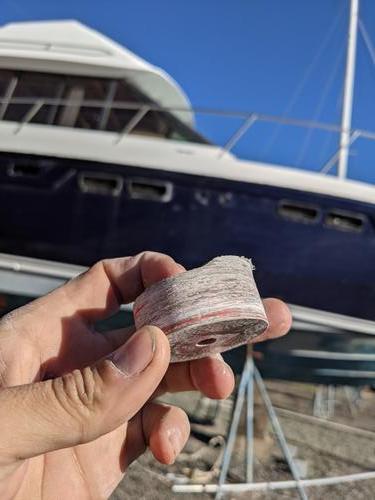
Nice and thick glass sandwich construction.
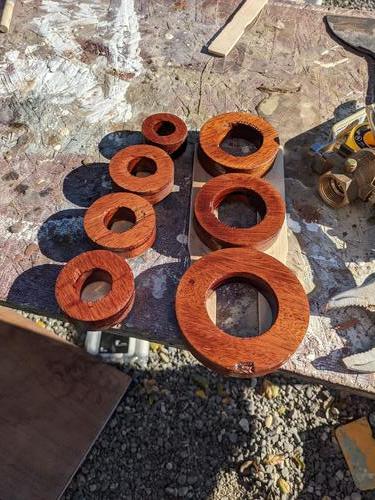
This is definitely where some people get upset with me. I had a bunch of spare stock of 4/4 mahogany board that I didn’t want to waste, so I got busy making some backing plates out of it. Before installing, I applied three coats of epoxy to the exterior to keep them sealed from any possible moisture intrusion.
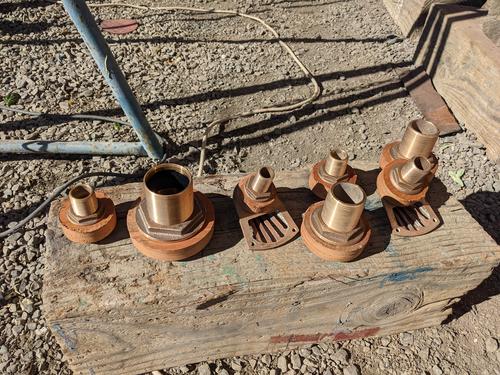
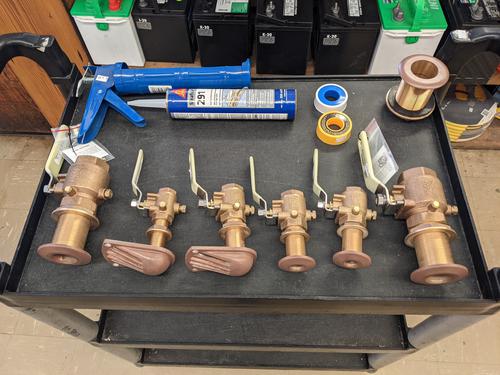
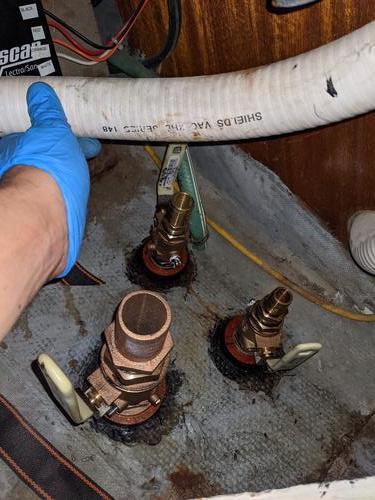
All of my new through-hulls, lined up and ready to be installed. The goal was to install all seven in one day.
I never shy away from a chance to show off something I’m proud of.
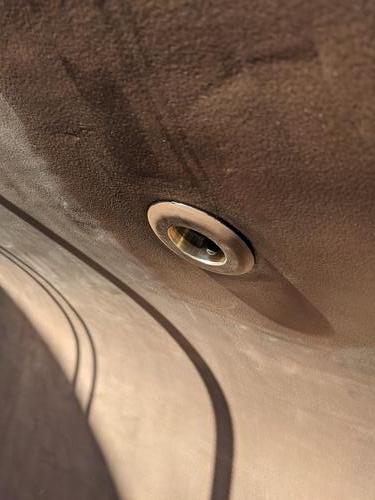
This is the transducer before being fully seated flush against the hull and before it was tightened all the way down.
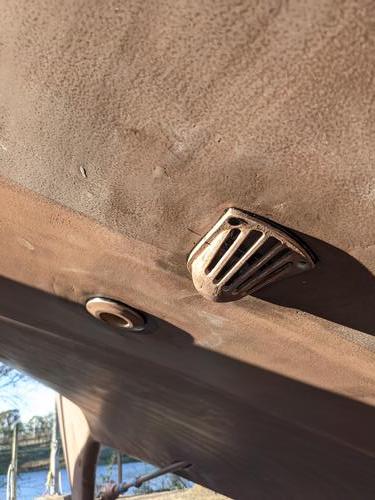
The new fridge scoop and sink drain installations turned out nice.
I’ve got three through-hulls for the head and another scoop for the raw water intake for the engine cooling system. It’s all looking great! Sikaflex 291 makes it really easy to create hermetic seals that you can be confident in.
Even my backing plates look decorative. Sure, the surrounding glass inside the cabinets could stand for a cleanup, but give me some credit?
Homeward Bound

With my through-hulls all patched, seated, and cured, there’s nothing stopping me from leaving the following day.
Again, admit it, you think this is sexy.
Admit it!
I had a volunteer help me clean up my area the evening before departure. What a surreal feeling that was. I had been stuck in Napa for three months, unable to receive deliveries and without a fridge or even a working bathroom closer than 1/5 of a mile away. And here I am, picking up the pieces to let me escape with a clear conscience.
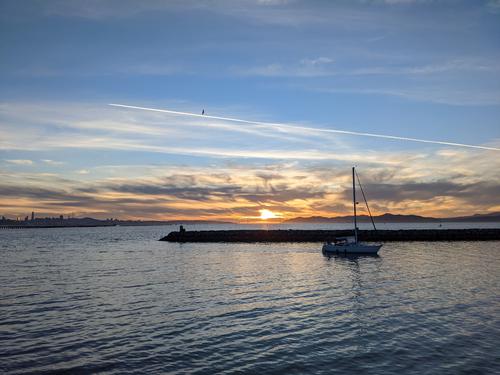
After three months, I departed Napa. I live-streamed the entire trip back, from being taken off the jackstands in Napa to arriving in Berkeley.
It only took me around five hours of motoring before I made it back home to Berkeley. Nothing broke, nothing went wrong. My newly-cleaned bottom, combined with the new Flex-o-Fold propeller pushed me along at a consistent 7.5 knots through the water, which is a full 1.5 knots more than before with the same 2600 RPMs. If I temporarily push it to 3000 RPM, I can break 8 knots and have an impressive wake follow me.
Epilogue
I rested for an entire week after getting back home. Soon after arriving, I locked in a new job. Things really started to all-of-a-sudden become more stable and look up.
My life, and I’m sure most others behave like waves…
Frequently, mine feel like fair-weather waves, never getting too uncomfortable, but in the worst times on the hard, I got a taste of the bad troughs. My last partner told me once that I should embrace all feelings, good and bad, and to feel them as much as I could.
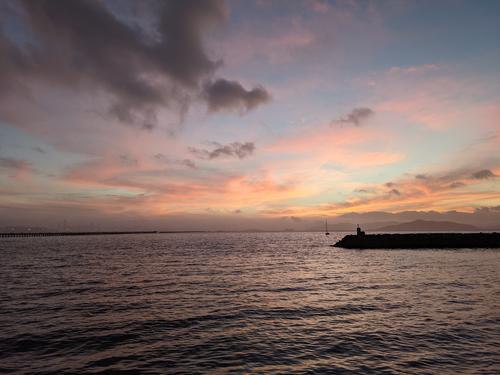
The clouds are starting to break for me; things are calming down, and everything is becoming clear. There’s more to come and I can’t wait to share it.
Special Thanks
Ichiro, Dustin, Charlotte, Ibrahim, Brent, Andy, Leah, Charles, Seth, Ruth, Garrett, Joel, Emma, Linh, Teal, Jane, Bob, and Stephen.
Previous: Wireless Networking on a Sailboat | Next: Replacing Chainplates
- [ 2024-09-01 ] Don't do It
- [ 2022-08-30 ] Mast Work and Synthetic Rigging
- [ 2022-04-19 ] What Happened On the First Trip?
- [ 2022-02-22 ] What's the Plan for Departure?
- [ 2020-10-21 ] Installing a New Electric Anchor System
- [ 2020-08-02 ] Making Custom Cockpit Cushions
- [ 2020-08-02 ] Setting Up A Signal K Server with a USB Gateway