Replacing Chainplates on a 1976 Ericson 36C
Fill the progress bar
Only for it to reset
Then it starts anew
The Problem
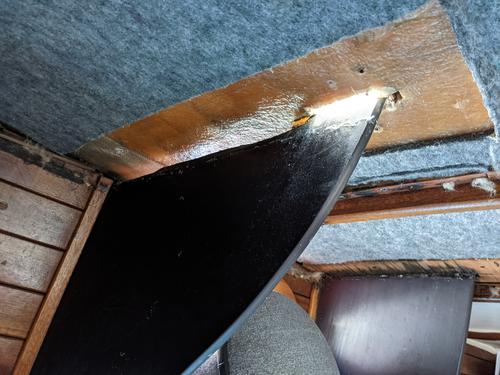
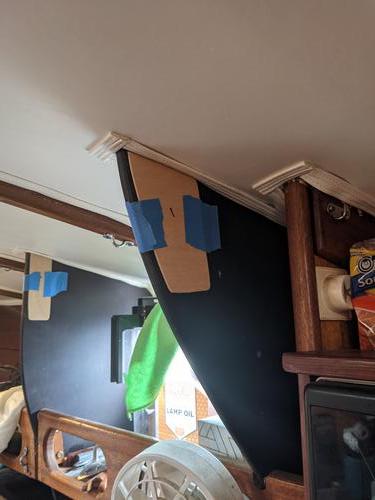
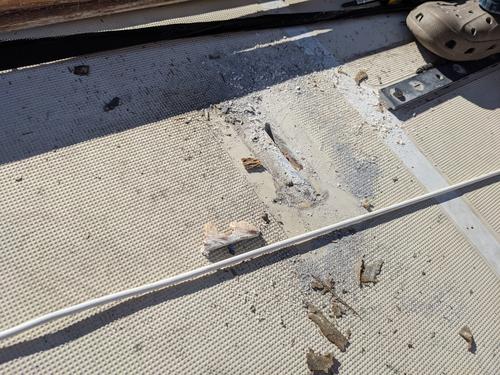
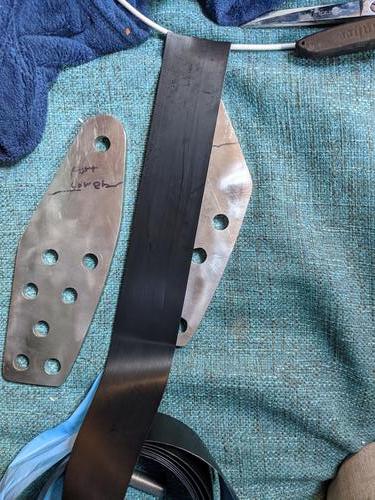
This hanging knee-looking piece is a single slab of aluminum that protrudes through the deck, exposed minimally above, like an iceberg. It is tabbed down the beam, nearly to the cabin sole.
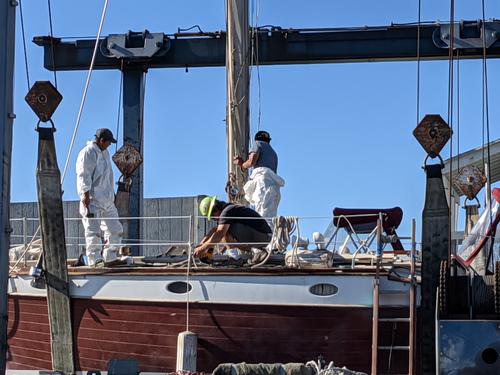
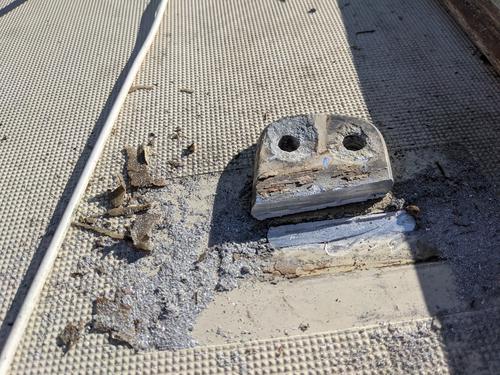
In late October, during the haulout where my mast was removed, an isssue was discovered involving my aluminum chainplates (yes… I know), where the steel clevis pins that attached them to the turnbuckles caused galvanic corrosion between the two dissimilar metals over the course of decades. My rigger, Ryan of Rogue Rigging explained the problem to me at the time.
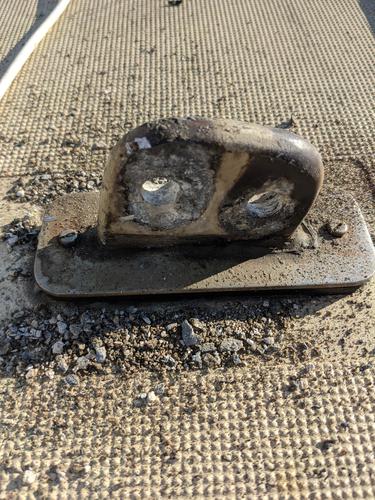
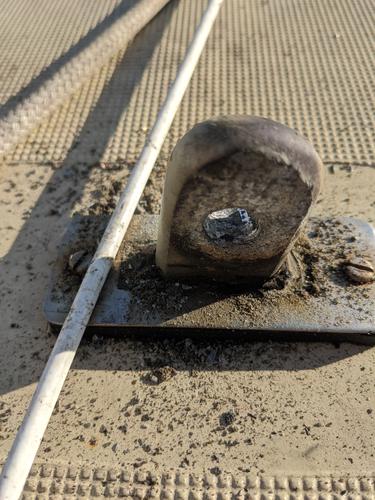
The flakes of metal that are resting on the deck are broken-off crumbs of aluminum that were “welded” to the steel clevis pin by way of electrochemical reduction across time.
Galvanic Corrosion
The chart below demonstrates how some metals interact with each other when in direct contact, particularly when submerged in an electrolyte.
The vertical axis is the metal that will be corroded by the metals defined in the rotated top row. The white color shows a risky combination that will likely corrode.
- | Magnesium | Zinc | Aluminum | Cadmium | Carbon Steel | Cast Iron | Stainless Steel | Lead | Nickel | Brass | Copper | Bronze | Nickel Copper | Nickel Chrome | Titanium | Silver | Graphite | Gold | Platinum | |
|---|---|---|---|---|---|---|---|---|---|---|---|---|---|---|---|---|---|---|---|---|
1 | Magnesium | |||||||||||||||||||
2 | Zinc | |||||||||||||||||||
3 | Aluminum | |||||||||||||||||||
4 | Cadmium | |||||||||||||||||||
5 | Carbon Steel | |||||||||||||||||||
6 | Cast Iron | |||||||||||||||||||
7 | Stainless Steel | |||||||||||||||||||
8 | Lead | |||||||||||||||||||
9 | Nickel | |||||||||||||||||||
10 | Brass | |||||||||||||||||||
11 | Copper | |||||||||||||||||||
12 | Bronze | |||||||||||||||||||
13 | Nickel Copper | |||||||||||||||||||
14 | Nickel Chrome | |||||||||||||||||||
15 | Titanium | |||||||||||||||||||
16 | Silver | |||||||||||||||||||
17 | Graphite | |||||||||||||||||||
18 | Gold | |||||||||||||||||||
19 | Platinum |
The more noble stainless steel causes the aluminum to corrode, giving me a really big, expensive headache.
Instead of curling into a ball and crying, which is my first instinct, I decide to seek out people smarter than me. The problem was discovered In October, but I would have to wait until February to do anything about it.
The Solution
There is a well-respected naval architect that the Berkeley Marine Center consults with and builds projects for on a regular basis, Jim Antrim.
Design
Although I’d spoken to many others about my aluminum chainplates, nobody except Jim had ever seen or heard about anything like it before. He didn’t seem very concerned, which made me feel a bit reassured.
I proposed going with titanium replacements, because it made sense to me that a highly-corrosive-resistant metal that also just happens to be the strongest chemical element that is known to exist would be a good choice. Jim agreed and got to work, starting with simple templates taken from below deck, along with a few measurements he required.
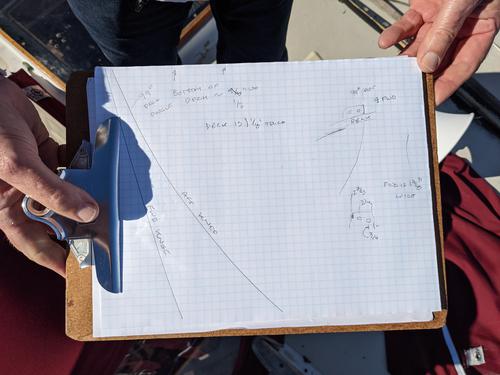
Using just what was on that clipboard, Jim was able to do some calculations and come up with some impressive CAD drawings.
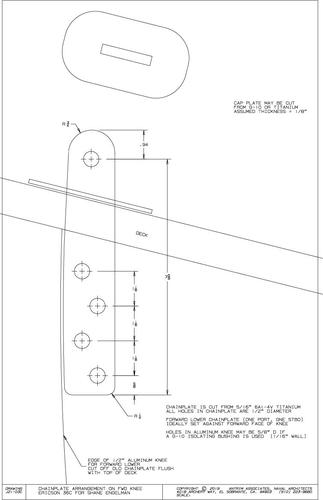
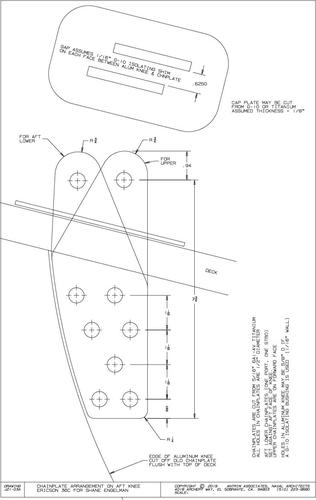
The first one shows the forward lower chainplates. These don’t have as high of a tension load and don’t need to be as beefy as the others.
My mast only has one spreader and the load for the upper and lower shrouds are shared by these bigger plates that will sandwich the existing aluminum, aligning on the screw hole patterns.
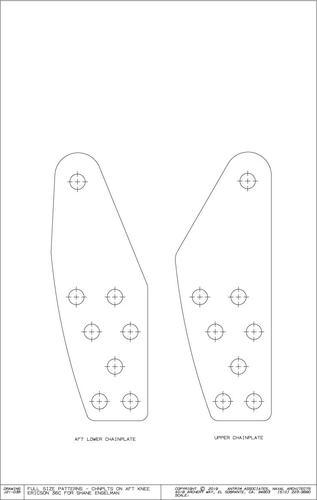
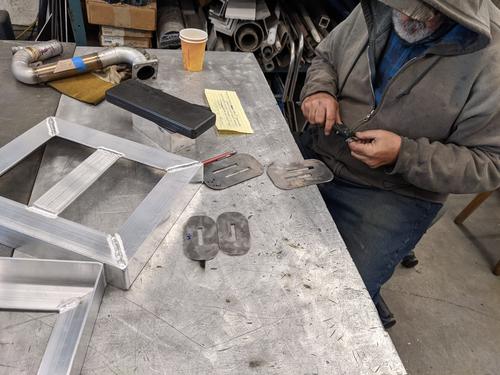
From here, I was able to cut more-three-dimensional templates out of 1/8” mahogany doorskin. The purpose for making rigid templates like these is to make sure the final shape is going to work out.
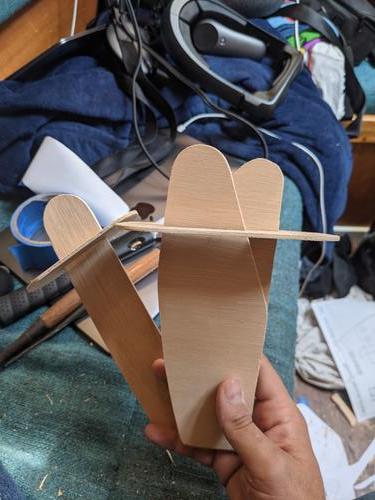
Everything fits. Now what?
Construction
Titanium is as expensive as it is strong and there’s exactly one place where it’s possible to get reasonably-priced custom Ti22 chainplates and only one guy to call, John Franta of Colligo Marine.
John was very accomodating and understanding of my problem. Once I had the specs for the cuts, he was all-in on getting my replacements sent out. All he required was the CAD from Jim and they were cut on Colligo’s water jet cutter in San Diego, then sent up here to the San Francisco Bay within about a week.

Ten pieces of titanium later, my galvanic isloation-induced long-term headache is starting to ease up a bit.
Installation
When explaining this chainplates issue, people commonly ask, “why don’t you just attach the chainplates to the outside of the hull on the beam?”
I relayed the question to both Jim and Ryan and was told my boat is not designed for that. It’s designed for the shrouds to route exactly where they previously were.
Destruction
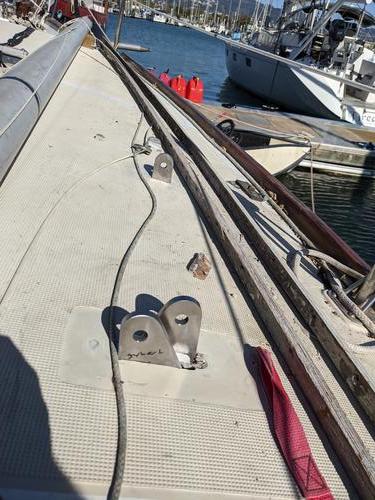
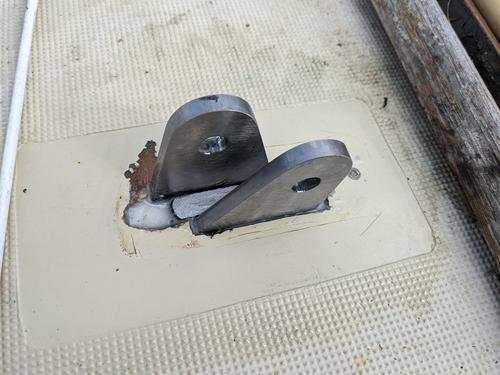
In order to put the new ones where the old portions previously were, the tips of those icebergs had to be cut off flush at the deck using an oscillating multitool.
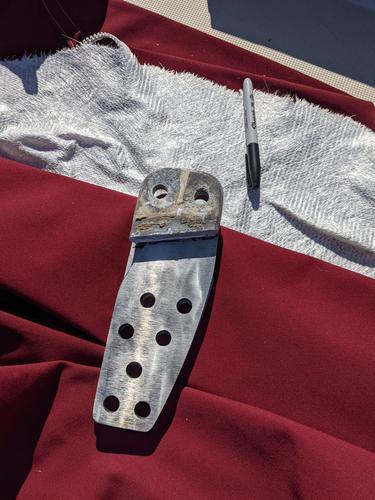
When taking the cut pieces and placing them on top of the sandwiched titanium replacements, the hole patterns match up nicely.
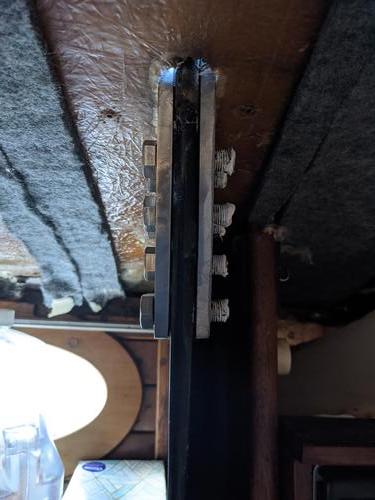
Because these new chainplate segments are sandwiched on the old aluminum slabs located below, new slots had to be cut in the deck to allow these pieces to be able to cross between topsides and the cabin.
Drilling
These sorts of cuts aren’t something you want to mess up and this next part made me tense up, knowing it can’t be undone. I decided to call in my best “boat guy,” Ichiro, whose work in the SF Bay area is famous for quality and precision. He agreed to help with the drilling.
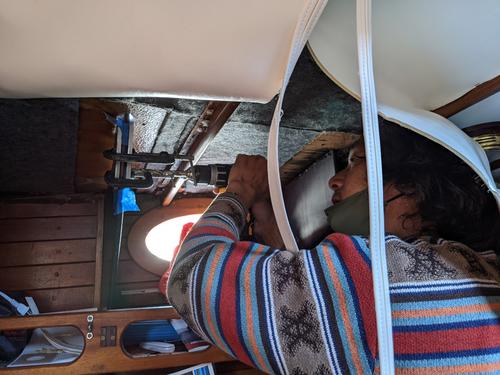
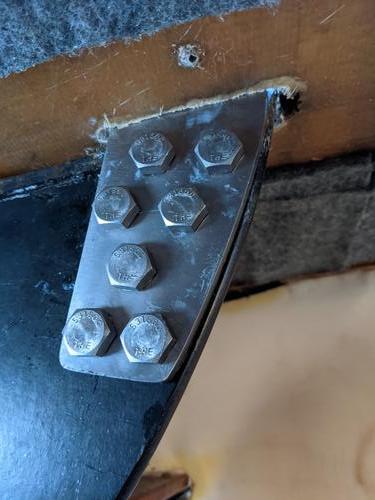
We taped and clamped the new chainplates in the correct spots and Ichiro fearlessly drilled through the old aluminum.

Thankfully, Jim’s measurements and templates were spot on, the holes aligning exactly athwartship where they’re supposed to, only offset fore and aft by about 5/8” in either direction as an artifact of the new sandwich attachment style.
If the old pieces that were chopped off are placed back in their old positions, the holes for the pins again align nicely.
Final Fastening
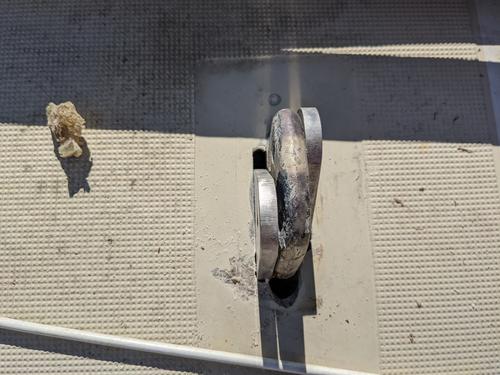
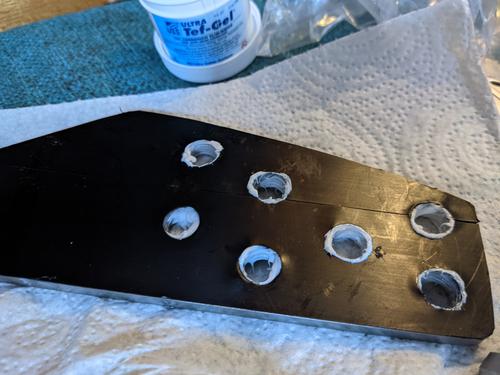
Although the aluminum below deck is anodized, it would still be susceptible to more galvanic issues if the titanium is butted directly against it. To account for this, I put some thin non-conductive film on the inside portion.
Along with this layer of protection, I applied Tef-Gel to the holes where the fasteners will go. This substance helps to electrically isolate dissimilar metals, commonly stainless steel fasteners in an aluminum mast.
While the chart above does not show it, 316 stainless steel (specifically) and titanium are quite close, electrochemically, with a very small corrosion potential. The bolts that are used for fastening are 316, which is still dangerous to aluminum. However, the risks of problems happening below deck, assuming there are no outside water leaks, are very low, considering that the galvanic corrosion process requires an electrolyte (such as water).
The Tef-Gel can be cleaned up later with some mineral spirits and a rag. All that’s left is to fill the holes still left in the deck with thickened epoxy and to apply the top plates and seal it all up with some Sika Flex.

Oh, whoops. It looks like the starboard-side plate has slightly incorrect spacing. I previously mentioned titanium is the strongest metal (not including alloys) that exists. If I were to try using a file to accurately shave the correct amount of material away, I would burn through them, as titanium is around four times harder than tool steel. Fortunately, the marina has a machine shop.
I took the plates to the resident machinist, Gian, who was able to make the cuts to the plates and while he had them, bevel the sharp edges to prevent accidental snags when walking on deck.
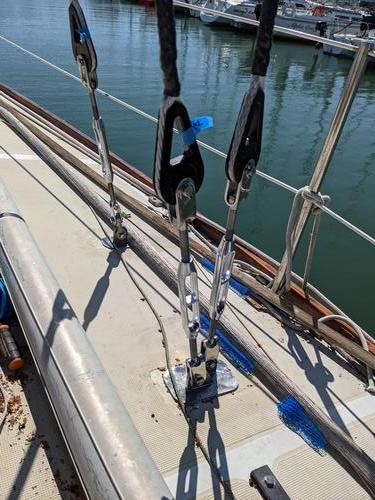
The deck is all filled and ready to be covered by the top plates and Sika Flex’d in-place!
Finally
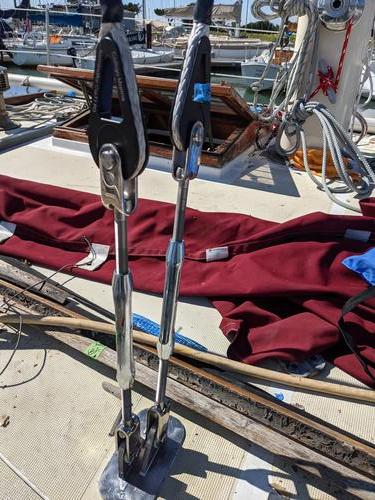
All Done. This time, I’m using appropriate pins. Make sure your rigger does, too.
These new chainplates will outlast me and the life of this boat and I am not mad about it. However, as with all boat project decisions, I’m certain some reader out there will find something to disagree with and make sure I know how wrong all of this is.
Cost Breakdown
| Type | Cost |
|---|---|
| Design | $750 |
| Fabrication | $1230 |
| Labor | $390 |
I’ve certainly spent more on other projects, so I consider this a win!
Previous: Three Months of Hell in Napa | Next: What's the Plan for Departure?
- [ 2024-09-01 ] Don't do It
- [ 2022-08-30 ] Mast Work and Synthetic Rigging
- [ 2022-04-19 ] What Happened On the First Trip?
- [ 2021-02-02 ] Wireless Networking on a Sailboat
- [ 2020-10-21 ] Installing a New Electric Anchor System
- [ 2020-08-02 ] Making Custom Cockpit Cushions
- [ 2020-08-02 ] Setting Up A Signal K Server with a USB Gateway